Stays
Although my MA supervisor has already chastised me for describing them thusly, it’s the easiest lay term to explain stays to people today: they were the 18th century equivalent of the corset. A useful analogy my supervisor passed on to me is that stays were the armiture of 18th century women’s clothing. I think of them as turning the human body into a mannequin on which to mount the clothing. I was recently talking with someone about my project who was surprised that the types of seams used in garment construction were strong enough for the tension they must have been under since (fashionable at least) clothing was so fitted. This is a bit of misconception. Clothing was fitted, yes, but not tight; seams should not be pulling. The reason being that the stays create a rigid form that holds its shape; the clothes do not have to negotiate or try to accommodate the fluid inconsistencies of a soft body.
Stays were another ubiquitous element of the early modern female. All women wore stays, except for the most abjectly poor (who often still wore unboned leather stays), and slaves in the American colonies. As with much of the clothing from this time period, it is not so much the shape or cut of the garment that indicates socio-economic status, but the materials from which it is made. Wealthy women could afford stays made from costly silk brocades in lush and lavish patterns. Working class women may have been able to purchase boned stays from the second-hand market, or may have had the leather type mentioned above.
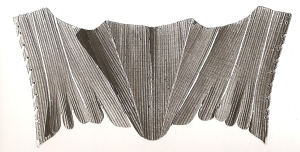
I have chosen to reproduce a set of stays that I believe falls somewhere in between these two: an example of boned stays covered with wool satin. These are derived directly from an extant garment in the Colonial Williamsburg collection, and are featured in the book Costume Close-Up. I have enlarged the pattern directly from the book, altering them only so they will fit me (I am the most available person to myself for fittings and tryings-on, so all of the garments of the project are made to the same basic size). According to the book, these stays are dated 1740-1760, and are of English origin. Perfect!
And here’s what they look like
The only other change I am making is to use reed for the boning as opposed to baleen – for rather obvious reasons. I ordered some cane to use as boning, but when it arrived found it was far too flimsy, I could snap it like a soggy toothpick. I have since ordered some reed from a site that sells it for the specific purpose of corsetry/staymaking – so we’ll see how that goes (fingers crossed!). I am still debating whether to use leather strips to bind the top and bottom, like the Williamsburg stays have; or use a wide linen twill tape as I have seen on a couple of examples in Britain (specifically at Bath and Edinburgh). We’ll see how well my fingers hold up through the bone channel stitching!
Materials
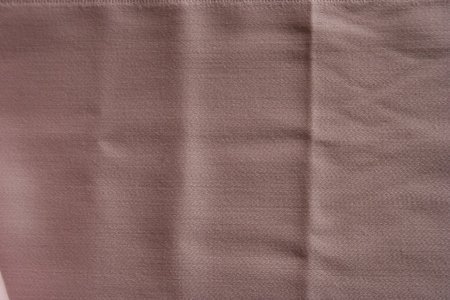
Lavendar/pink 100% wool satin/sateen (the colour even appears to match the example in Costume Close-Up!!)
Unbleached 8oz plain weave linen for interlining
Bleached lightweight, plain weave linen for lining
Taupe coloured silk thread
White linen thread
1/4″ linen tape to cover the seams
Day 1
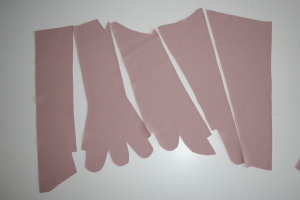
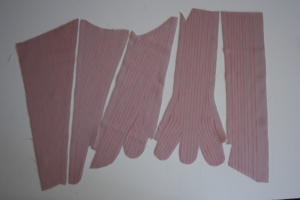
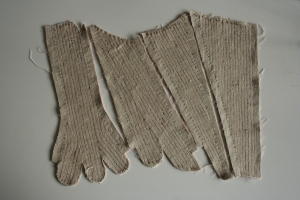
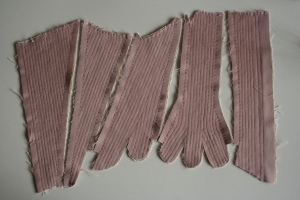
I had already enlarged the pattern from the Costume Close-Up book, so started today by cutting out all the layers. I started with the outer wool layer:
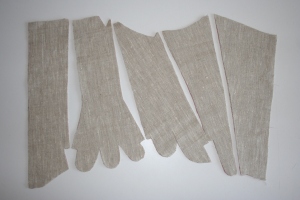
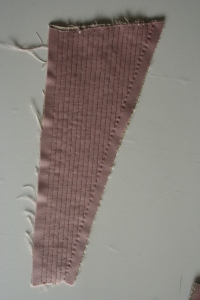
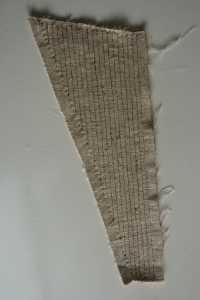
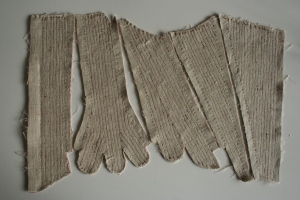
Next I cut the interlining layers:
Finally I cut the lining pieces – I’ll post those pics when I get to sewing that part.
I gave each piece of the wool and heavy linen layers a pressing so they would be nice and crisply smooth for sewing.
I then marked the stitching lines on the wool pieces for one half of the stays in a red fabric pencil. I figured this ought to be fairly inconspicuous: red on pink.
After this I put all the layers for each piece together and pinned the edges to hold them for sewing.
Starting from centre front I began sewing the boning channels with backstitch (trying to sew small stitches) using the taupe coloured silk twist thread. Although I sewed the centre front seamline with backstitch, I decided to make my life the teensiest bit easier by not continuing with that. Instead, the subsequent seamlines are sewn with running stitch. I kinda thought of doing backstitch, and then sewing the seams (which I think will be with small whipstitches) might be overkill. It also cuts a bit of the time this is all going to take.
Here is the first piece done (it took me about 6hrs – eep!):
I really hope I start getting faster with the sewing *very* soon!
Day 2
Today was basically just a continuation of sewing boning channels. I think that’s what several days are going to be comprised of. However – I am at least getting faster with the backstitching (thank heavens for small mercies!).
I got the channels sewn into three pieces today, so this is where it’s at now:
Day 3
I got the bone casings of one half of the stays done today:
A friend came over to use my sewing machine that afternoon (really someone should since I can’t, I’m worried they feel neglected!) so I wasn’t *quite* as productive as I otherwide would have been. Still, I got another 1 and 2/3 pieces sewn up with channels. I’m really hoping it will only take another full day’s worth to get them all finished. Stay tuned to see how that turns out!
Day 4
More boning channel stitching!
Day 5
Finally finished the boning channel stitching – hooray!
Here’s what it looks like all done:
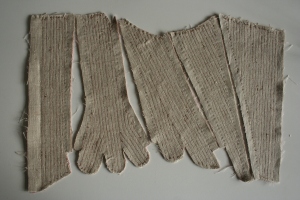
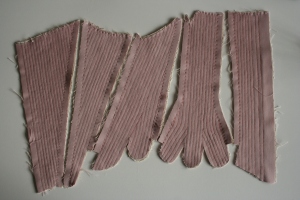
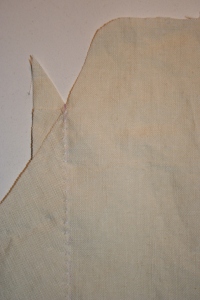
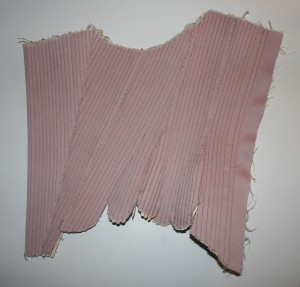
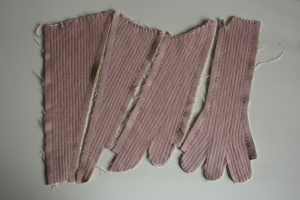
I didn’t yet have the reed/cane I was going to use for boning so I started on the lining next. I had to first alter the pattern because the lining is in fewer pieces than the stays themselves. Once that was done I cut it out:
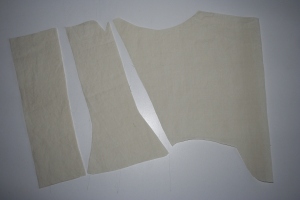
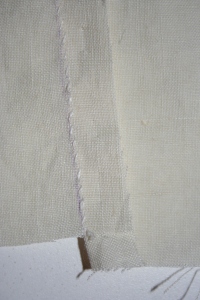
and sewed it together with lapped seams and slanted stitches:
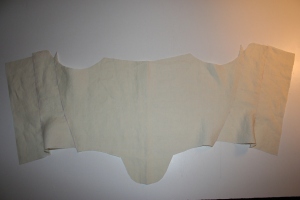
Day 6
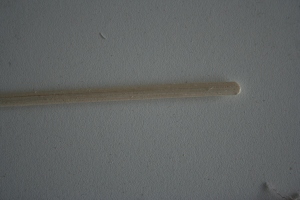
The reed/cane had arrived, so it was on to the oh-so-fun task of boning! It comes in a big coil:
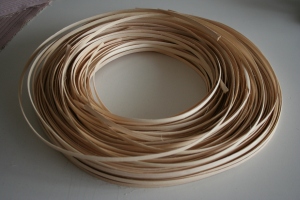
So when you cut pieces off they’re curled, and want to curl up your pieces of stays when you push them in. This annoyed me so I ironed and steamed the pieces to straighten them out – and it worked very well!
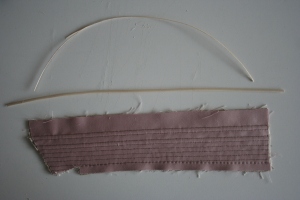
I also found that I’d ordered the stuff in slightly too great a width. I therefore had to slice a bit off each piece, and I also rounded the ends.
Here is a comparison shot of the centre front pieces, one is boned and the other is not:
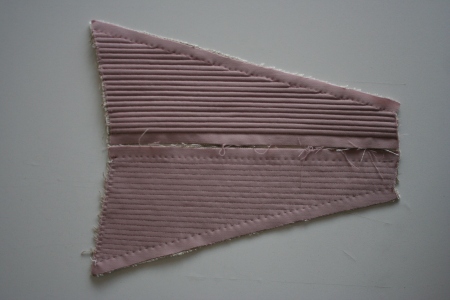
I really like the almost sculptural quality of the boning in the casings.
Well, I was so excited about starting the boning, but getting tired of how sore it was making my hands, that once I’d gotten a centre and side front piece done I decided to try sewing them together. I first pressed under the seam allowances, then stitched them to the underside with large slanted stitches as I’d seen on the example at Berrington Hall. I’m not entirely sure it was correct to tack down the seam allowances prior to stitching the pieces together, however. The stays at Berrington Hall really looked to me as though this was done after; but it would be so awkward and unwieldy I decided to take the risk that I was fudging it.

Then I sewed the two above pieces together using closely spaced whip stitches. It looks messy, but so did this stitching on the original stays, so that’s a good thing! Unfortunately, I noticed near the end that the pieces weren’t lining up anymore – D’oh! I had to take most of the seam out and pay attention to this the next time ’round.

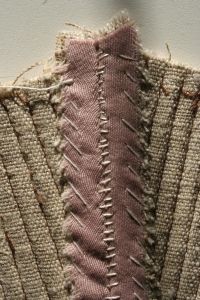
By the end of the day I’d gotten one side of the stays assembled in this way and they look the way they’re supposed to, Hooray!
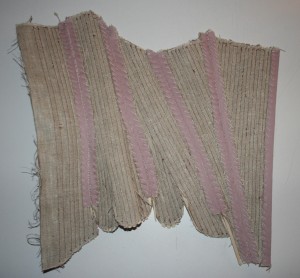
Day 7
I started today by finishing up boning the other half of the stays sections.
Then I cut out very narrow (1/8″ wide) strips of bone coloured pigskin suede to cover-up the unsightly whipstitched seams as I’d seen on the original stays.
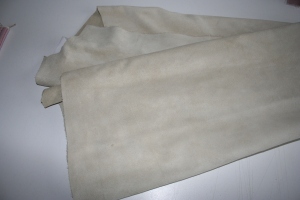
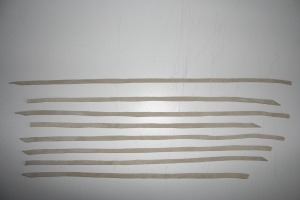
I sewed the leather seam coverings onto the half of stays I’d already assembled using, basically, just tacking stitches.
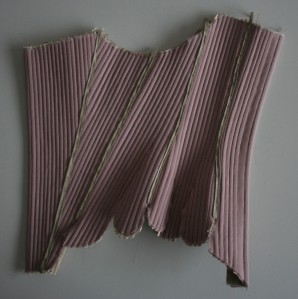
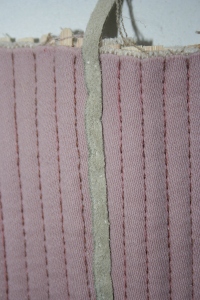
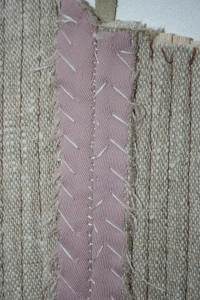
I’d gotten as far as I could with one half of the stays, so then worked to get caught up with the other half. Once I had two identical halves (well, as identical as you can get eith hand-sewing) I whip-stitched them together at the centre front seam, applied the seam covering, et voila – THEY LOOK LIKE STAYS!!! WOO HOO!
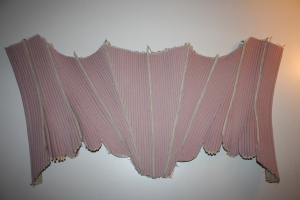
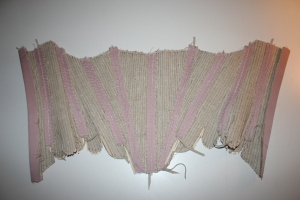
Day 8
This was binding day. Sewing leather binding onto a set of stays is not fun, but I’ll get to that in a bit.
First off I needed to cut strips from the same leather I used to cover the seams. I cut them at approximately 37″ x 1 1/4″.
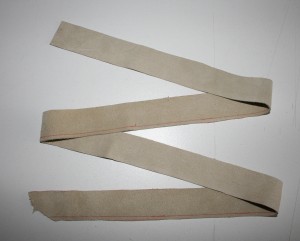
By the time I’d gotten to this point, the top and bottom edges of the stays were getting a little rough-looking, which would make it just awful (well, more awful) to sew on. I took my big scary shears and neatened the top edge. Then I laid the binding on the outside of the stays and stitched it on with (very uneven!) backstitches uses a coarse linen thread.
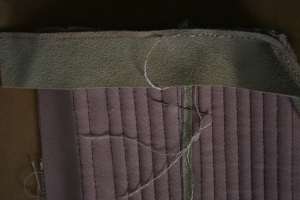
Oops! I’d not thought to finish the centre back edges of the stays first:
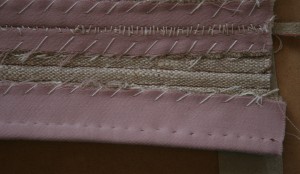
Then I could finish getting the binding on, and it looked like this.
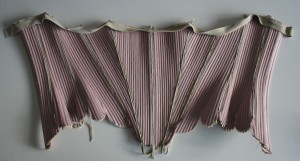
Before pulling the binding to the other side I took a shot of all the layers in this thing:
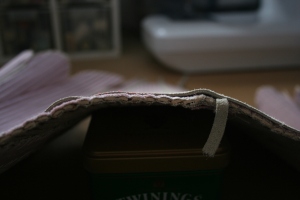
Next step was to fold the binding over the top edge of the stays and around to the back. I stitched it down with rough catch-stitches while exerting considerable tension on the leather binding to make it wrap around the top edge of the stays as tightly as possible. To say this was not fun would be my understatement of the year. And it only got better (sarcasm alert) from there.
Once that chore was done, it was onto the bottom edge – with all the scalloped tab-shapes. Now the job had become both painful and extremely awkward.
It was sometime around this point that I started thinking the reason not many women worked in this trade was not so much to do with gender biases, but that they were just smart enough not to get into it!
Day 9
The very worst part followed next: folding the binding to the inside of the stays at the bottom edge and stitching it down. Again, I had to maintain stress on the binding to try and make it as tight as possible. I was not consistently successful at this. Oh well.
You may have noticed that I don’t have photos for these last few steps. My bad. I was just so frustrated, determined, pre-occuppied, and upset all at the same time that I completely forgot to take any. I’m sorry! But a few other shots give an idea of what I did.
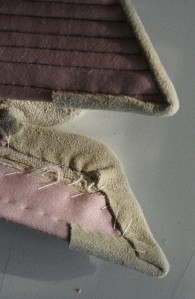
Here is the binding all finished from the outside:
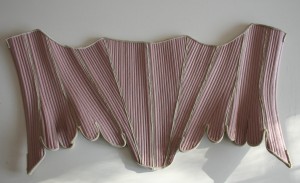
Here’s the photo of the original stays again for comparison purposes:
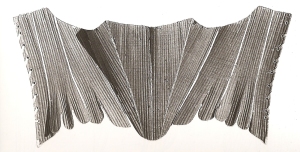
So, despite how horrid the binding was, the result was oh-so satisfying. I could have wept with relief!
Here’s the inside:
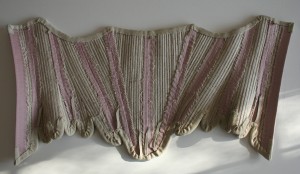
And a close-up shot of the outside and inside edges:
Day 10
Now that the binding was all done I was sure the worst was over. And it was….sorta.
The next step was making the eyelet holes along the centre back edges. There were too many layers of fabric for my punch to be much use, so I had to use a combination of an awl and scissors. That’s not a fun way to go, and my poor hands got as sore and tired as sewing the leather made them.
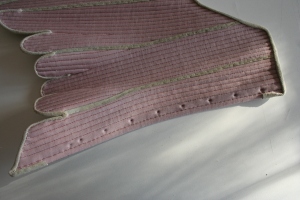
Once that was done it was on to actually stitching the eyelets. The manner of this stitching might seem very rough, even crude, but it’s how the originals looked. I can only guess that it wasn’t considered worth it to do actual buttonhole stitching to make the eyelets look pretty – functionality and speed often seem to have been the paramount priorities.
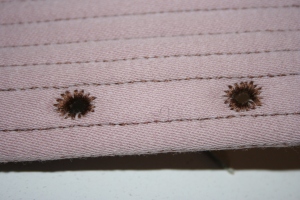
This was an extremely TEDIOUS process, and after getting about halfway I decided I needed to do something else for a while.
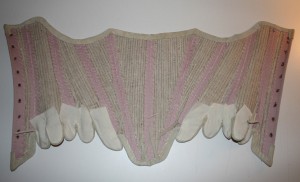
So, I started preparing and sewing on the lining pieces for the tabs. The tabs are lined individually and separately from the body of the stays. I’m not exactly sure why, but my hypothesis is that it would be just too fiddly whenever you wanted to re-line the stays. I imaginge stays were relined regularly as a form of maintanence, and imagine having to fuss with all those tabs each time!
To attach the tab lining pieces I simply folded under the raw edges and slanted-stitched them to the leather binding (oh fun).

Day 11
I started off today by finishing the eyelets, like I knew I just had to. I could see the light at the end of the tunnel at this point, so it didn’t feel quite so tedious as before.
I did a final press of the overall lining and lined the centre back tabs. Then I sewed in the overall lining using the same method of turning under the raw edges and slant-stitching it to the leather binding.
And with that – the stays are FINISHED!! HOORAY!!
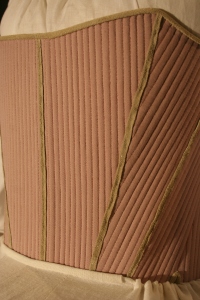
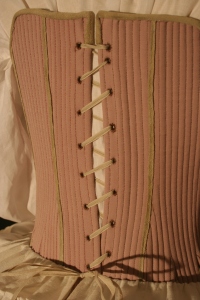
Annnnnnnnd, I appear not to have taken photos of the finished inside, or of the stays mounted by themselves. D’oh. Here’s what I do have of the finished product. I promise that when I go back to Edmonton (I have to finish and defend my thesis at some point!) I’ll take photos of what’s missing.
29 Comments »
{ RSS feed for comments on this post} · { TrackBack URI }
Julia Said:
on October 13, 2008 at 22:26
Off topic happy relevant news: The Metropolitan Museum of Art’s Costume Institute now has all of its collection online with many photos not previously available:
http://www.metmuseum.org/works_of_art/collection_database/listview.aspx?page=1&sort=0&sortdir=asc&keyword=&fp=1&dd1=8&dd2=0&vw=1
I personally dislike the way they catalogue objects – “18th”? “dress”?? – but it’s still a great resource. Enjoy!
Ingrid Mida Said:
on November 5, 2009 at 14:16
I was entranced by the post. The amount of effort required to make the stays is far more than I would have guessed. Thanks for sharing this. I am inspired!
Maren Lauder Said:
on January 11, 2010 at 09:43
I really liked the detailed explanation. Having made 4 sets of stays myself (and contemplating a fifth pair with foreboding) I wish I had had this blog to refer to on my last pair, which I drafted myself and used skin binding on as you did. I liked the idea of sepreately lining the tabs and putting lining in after the binding (I HATE binding). I will recommend this site to my reenacting ladies attempting stay themselves for the first time. It will answer so many questions!
Bess Chilver Said:
on January 14, 2010 at 04:36
Gorgeous stays. May I ask where did you bought the wool satin from?
I’ve found two places but both are very expensive as was interested as to whether you use the same two places.
brocadegoddess Said:
on January 21, 2010 at 13:50
Hi Bess,
Sorry I didn’t respond sooner, but if you look at the comment from Linda Hutcheson (should be a couple below your’s) I’ve answered your question about the wool satin. Sorry I don’t have a better bargain solution for you, but wool satin can be tough to come by these days, I got really lucky!
Dani Haviland Said:
on January 14, 2010 at 11:35
Wow! I’ll bet if you made them for sale they’d cost at least a grand each!
brocadegoddess Said:
on January 14, 2010 at 14:16
Something like that! 🙂
Linda Hutcheson Said:
on January 21, 2010 at 11:54
I loved the large photos. I’m a novice sewer and planning my first set of stays. Your site was extremely helpful in visualizing all the steps. Where did you find you wool satin?
brocadegoddess Said:
on January 21, 2010 at 13:47
Hi Linda,
Thanks for the comment and encouragement! I got the wool sating from this place:
http://www.classactfabrics.com/index.html
She has some lovely things, but it’s a crap-shoot – no regular, re-orderable stock. I lucked out on this one. There are other places online you can wool satin from, however. For example here:
http://www.fabrics.net/outlet/fabrics.asp?ProductType=Wool+Satin+Gaberdine
or here:
They are significantly more expensive, but it’s 58-60″ wide so you wouldn’t need much for a set of stays.
Natalie (aka ZipZip) Said:
on April 23, 2010 at 09:11
Dear BrocadeGoddess,
Thank you for the superb documentation. The photos and especially the comparisions with the original stays are helping me immensely.
Am in the middle of Past Patterns transitional stays (1790s) and while they are from a later decade, many of the issues I face are similar to those you faced. I referred to Costume Close-Up, too, but needed more details, and here they are! What a relief to know that the original stays and yours had messy whipstitching/overcasting connecting the stays pieces together. I wondered whether the leather strips covering the seams were to hide the mess and sure enough :} Makes me feel a LOT better, for try as I might, even to practically counting threads, I could not get every stitch even, and the first sets of stitches were perfectly awful.
What would you say were the stitches per inch for overcasting the seams together? Saundra Altmann has us use 8-10 per inch, but 8 seems too little, and ten is a pain to measure out, so I did 16, but that may be too many.
Finally, had you considered offering this site and the exhibition photos/documentation as an e-book with high-res photos? If so I would be a buyer!
Any advice appreciated,
Natalie in Kentucky
brocadegoddess Said:
on April 23, 2010 at 10:48
Hi Natalie,
I’m very glad this is so helpful to you! I have thought about trying to get something published that is a combination of this project and my thesis research on the social history of eighteenth century English seamstresses and garment construction within the sewing trades of that time.
I don’t have a number of stitches per inch rule to give you, I doubt very much that staymakers of the time used such calculations. I just went by a visual assessment of the originals and attempted to approximate the density. If you’d like I can email you photos of the stays I examine, but you’d have to promise promise promise not to post the photos online. Although I took the photos, I see them as technically the property of the museum where I took them (in this case Berrington Hall, Hereford), and they generally don’t like people putting their own research photos online, and I want to keep in all their good books!
Something to keep in mind when thinking of 18th century/pre-industrial clothing construction is that it was a much more organic process than modern garment construction. Achieving good fit, and elegant draping, etc were very important, but it was allowed for stitches to be visible and less than uniform. Such ‘imperfections’ (as we might consider them today) become mostly invisible when the whole garment is finished; and inasmuch as they are discernable, all work together to create a truer visual effect. And when something like stays were constructed, the makers were not thinking “ok, I need to have this many stitches per inch to look neat and uniform”, they were concerned with how dense the stitches needed to be to make the seams sturdy, and yet get them done as quickly as possible because time is shillings.
Hope that helps you at least feel more relaxed about sewing for this period, and with your stays in particular,
Carolyn
Gail Said:
on July 12, 2010 at 16:47
You saved me! I have miss placed my directions to my stays but with your description I am able to finish! Thank you for taking the time to document your progress.
brocadegoddess Said:
on July 12, 2010 at 17:11
Hooray! I’m glad my work could be here to help!
Mary Said:
on January 28, 2011 at 10:21
Thank you for reiterating that stays are stays, NOT ‘corsets’, and for your supreme accuracy and skill. I am SO TIRED of all the so-called seamstresses out there making these with straps and still calling them stays, making them using plastic zipties for the boning, and using metal grommets—(OUCH, from someone who must be in stays 10 and 12 hours at a time at reenactments!) It is also comforting to see them laced with what appears to be Dutch linen tape (my personal preference), and not the unrealistic satin ribbon, which would never hold up, or stay in place, for most of the reenacting we do…
http://anhistoricallady.blogspot.com
Barbara Said:
on May 23, 2011 at 18:13
I have an umpteen great-aunt (early 19th C) who is described on her death certificate as a stay-maker. I thought she was a skilled tradeswoman but you have shown me just HOW skilled she must have been. We have a tradition of needlewomen in our family: my grandmother and her two sisters were dress makers and they had been apprenticed to their aunt. Not only were good seamestresses always in demand, but it was one of the trades that a superior artisan’s wife could carry on after her marriage and contribute to the family income.
brocadegoddess Said:
on May 14, 2012 at 07:37
Actually Barbara, stay-making in the mid-18th century and early 19th century were very different. Women’s stays became increasingly lighter and less boned post-1770, at which point it became more common and acceptable for women to engage in this area of work – although they were certainly involved beforehand. If by early 19th century you mean the Regency period, stays were just about at their lightest, frequently “boned” with just cord, or simply not at all. This is not to suggest that your ancestor was unskilled, but the work would have been less heavy-duty.
Iris Said:
on May 12, 2012 at 06:06
I wonder what size the stays should be? I want to make one but I’m not sure how tight it should be.
Brabara Said:
on May 12, 2012 at 07:00
Just a small point: “stays” is plural. “I want to make THEM but I am not sure how tight THEY should be” Sorry to be pedantic but A STAY is just one of the strips of whalebone or wickerwork or steel or whatever. As for size, it depends on how big YOU are! They should fit snugly. Be comfortable. Support you but not constrict you. Think everyday bra! (I have a staymaker – and a tambourer – in my ancestry too!)
beverleyeikli Said:
on October 21, 2012 at 20:38
Thank you for such a tremendously interesting post. I’m gleaning all the information I can get as I prepare to make my first set of 1780’s stays and this has been invaluable!
brocadegoddess Said:
on October 22, 2012 at 03:58
Dear Beverly,
Thank you very much for your kind words. May I suggest that you also look into specifically 1780s stays as well? They changed somewhat between the time period I worked on and the 4th quarter of the century. For instance, post-1770 stays were often more lightly boned, which will probably be welcome news to you for embarking on your first set! Good luck with your stays!
Juliana Lopes Said:
on October 26, 2012 at 19:50
Such a great tutorial! Thank you so much!
designdreamer Said:
on December 20, 2012 at 10:49
WOW! That’s impressive!!!
Found you via PR – your review of the Rbecca Taylor suit. Which was allso impressive!!!
Are you still creating period pieces?
Lilly Said:
on March 4, 2013 at 17:17
I am a sixteen-year-old seamstress and I absolutely love your work! I am also extremely fond of reenactment pieces as well as originals. Your work is beautiful and I look forward (with no lack of enthusiasm and excitement) to your next project!
Lilly Said:
on March 4, 2013 at 17:19
Oh, and thank you for documenting and posting your projects so that I can see all the work that would be required and the steps to complete a project…as well as the finished piece (so that on some afternoon when I’m feeling especially doubtful that I’ll ever finish it, I’ll be encouraged) 🙂
Stays time | Avant Garbe Said:
on February 13, 2015 at 19:28
[…] https://brocadegoddess.wordpress.com/stays/ […]
Allison Said:
on July 7, 2017 at 11:47
First of all, THANK YOU for doing this! My husband wants to get into 18th century reenactment and so that leaves the sewing to me. I am excited for this undertaking for both of our “costumes”, but super nervous about stays, so again thank you. I feel a little better having this as a resource. I do have a question. Where did you end up getting the boning you used? I didn’t think I saw a mention.
themodernmantuamaker Said:
on August 30, 2017 at 06:30
Hi Allison, I’m so glad this can be helpful to you! I can’t remember anymore where I got the reed from for the boning but I know that it’s sold online at the Sign of the Golden Scissors and if you google “reed for boning” then you’ll get lots of (legitimate, lol) hits.
c. 1785 Green Linen Stays (Construction Details) – The Quintessential Clothes Pen Said:
on December 10, 2022 at 23:37
[…] The Rococo: 18th century stays (the shape is earlier than mine, but the process is basically the same and this has lots of great […]
c. 1785 Stays Of Success Part VII: Conclusions, Reflections, & Resources – The Quintessential Clothes Pen Said:
on July 31, 2023 at 21:16
[…] The Rococo: 18th century stays (the shape is earlier than mine, but the process is basically the same and this has lots of great […]