Riding Habit
The riding habit seems (to me anyway) to have been an equivalent to modern day “sportswear”, as in casual daywear. In addition to being worn for actual riding, it was a woman’s “suit” that was popular for travelling in general and while out walking.
Women’s riding habits were styled after men’s fashionable dress of the time, were under the category of tailored garments, and thus predominantly made by male tailors. However, my examination of artefacts has led me to believe that riding habits were indeed also made by female seamstresses.
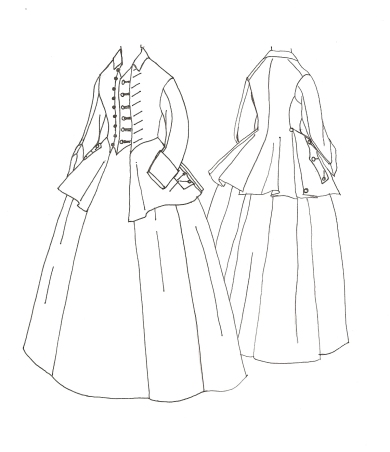
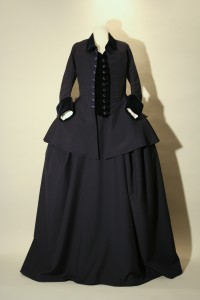
The riding habit I am reproducing is one of these that I believe to have been made by a woman and is in the Museum of London’s collection. I drafted a pattern directly from the garment (the jacket only, the petticoat is missing as per usual) while at the museum. Due to availability and time constraints, I am using a different colour in different fabrics than the original. The original artefact is made from a fawn coloured silk/wool blend that I *think* is camlet or callimanco, and it’s accented with yellow silk satin. I am using a navy blue worsted wool, accented with matching navy silk pile velvet.
Day 1
I began today with a little pattern touch-up work. Generally I try to have the patterns all ready to go before an actual sewing day, but occassionally it just doesn’t quite work out. So today I needed to make some adjustments to the pattern that I’d forgotten to do earlier, just minor detail stuff.
My first proper task of the day was to start cutting – oh boy! I cut the back pieces of the jacket, the bodice fronts, skirt fronts, and pocket flaps from the wool. I then cut out the bodice lining pieces from linen.
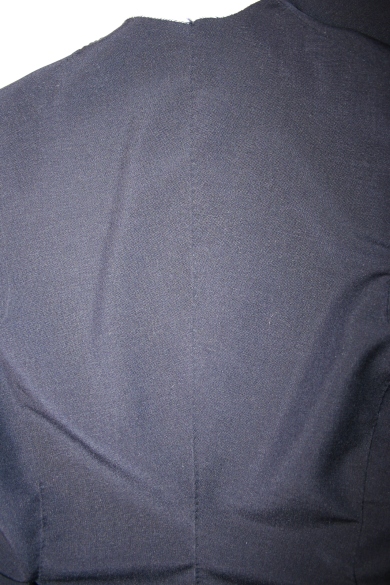
I started sewing with the jacket centre back seam which was lapped and sewn with running/stab stitches.
Next I sewed the jacket front waist seams with quite small back stitches.
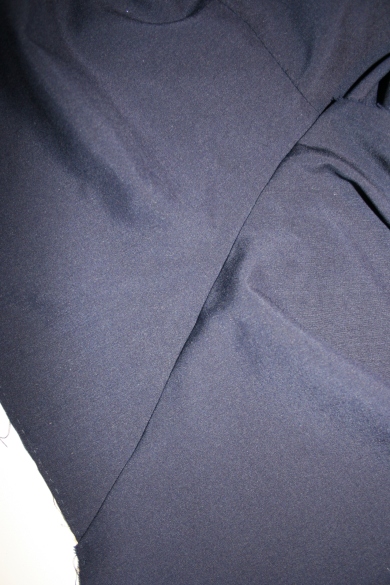
I then sewed the jacket side back and shoulders seams, all lapped and running/stab stitched.
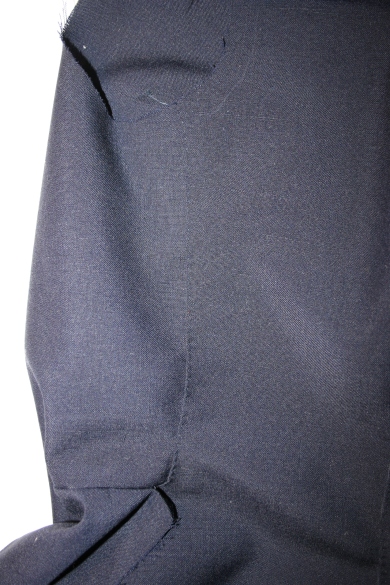
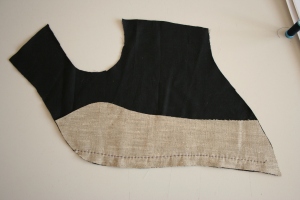
Now that I had the basic body of the jacket together I turned to the lining and sewed the centre back and shoulder seams. The centre back seam was sewn right sides together with small running stitches using linen thread. The shoulder seams were lapped and slip stitched, also with linen thread.
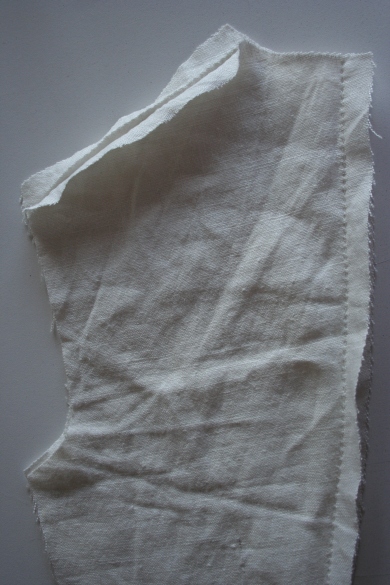
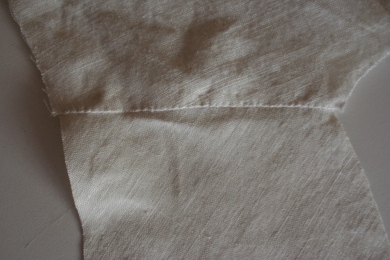
Since I wasn’t entirely sure how to proceed after this and didn’t feel like putting thought into it anymore that day I decided to sew up the pocket flaps, which are self-lined. I sewed each piece right sides together with small running stitches, then managed to turn one of them and top-stitch close to the edges.
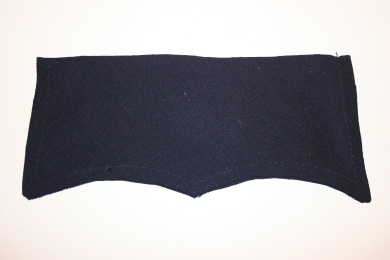
Day 2
I started today by trying on the jacket as it was so far. Uh…..oops…..the bodice doesn’t fit across the front. Bugger.
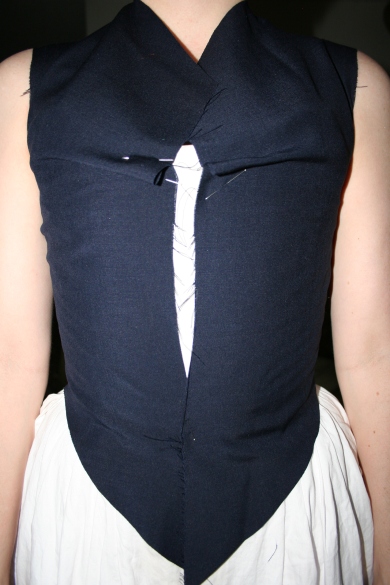
So, back to the drafting table for me. Either I still need quite a lot of practice at drafting from artifact garments, or this person had basically no bust whatsoever. I think I’m going to go somewhere in the middle and say it’s a little of column A and a little of cloumn B – to be kinder to the both of us.
I altered and re-cut the wool. Of course this means I also have to re-cut the linen lining and the linen canvas interfacing pieces. What fun. I’m sure that if I had been a real seamstress of the 18th century and made this mistake I would have been seriously……..reprimanded. Hmm.
Today, therefore, also involved significant re-sewing. I re-did the side and shoulder seams of the jacket. Then re-sewed the jacket front bodice and skirt pieces together all with the same seaming techniques as I did in the first place. Yes, I re-did all that backstitch at the front waist seams. At least it was good backstitch practice and I’m starting to get my stitches quite small.
Now, I had re-drafted the bodice fronts to be quite generous – just in case. Thus, my next task was to drape thejacket body and trim the jacket bodice front edges. I then drew in the darts on the bodice centre fronts and sewed them up with backstitch (more practice, whee!!)
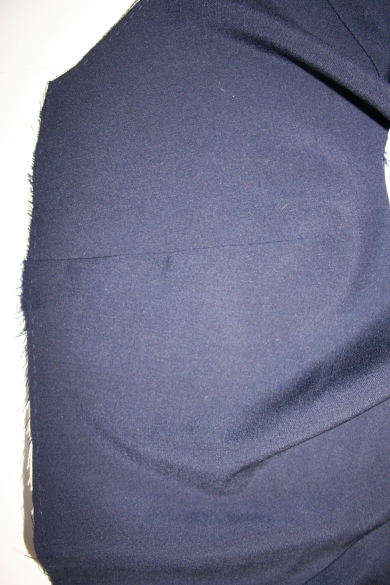
Finally for the day, I un-picked the shoulder seams of the linen bodice lining in preparation for fixing that up.
Day 3
I started today by recutting the bodice front linings, sewing the bodice lining darts to match the ones in the jacket fabric, but using small running stitches instead of backstitch. I then re-sewed the lining shoulder seams the same way as I had done the first time; and I re-cut the front edge linen canvas interfacing pieces.
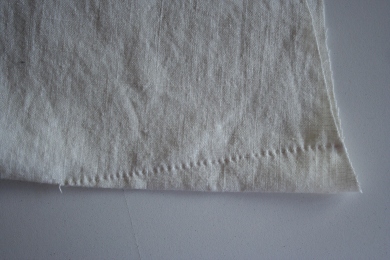
Because I guess I just could not get on the ball, there was more drafting today: the sleeves; and cut them out.
Then, surprise surprise, I sewed them up. They were sewn with lapped seams and running/prick stitches (have I mentioned before that I love this seaming technique? It’s so quick and easy – as far as hand sewing goes – and really quite strong! Must have been a very clever person who thought this up).
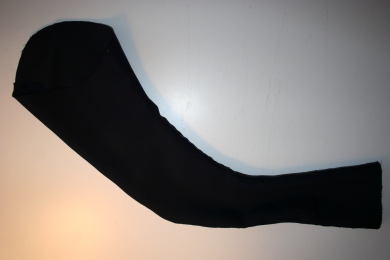
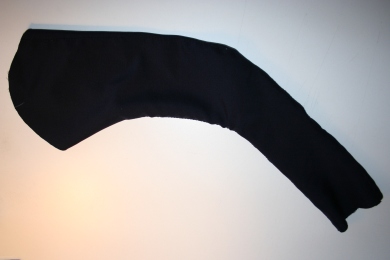
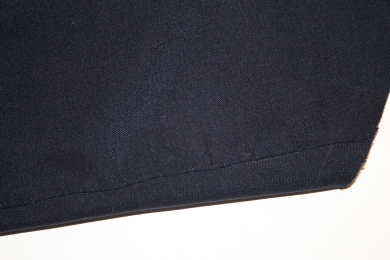
Then, for something completely different (and because I didn’t feel up to setting in the sleeves today) I turned and top-stitched the other pocket flap, so now they’re both done.
Next (to continue avoiding sleeve-setting-in) I cut out the pieces for the matching petticoat and started sewing up the side seams with smallish running stitches. Since woollen cloth could come in much wider dimensions than other cloths at the time I am not going to add false fabric joining seams into the skirts. As far as I understand it was possible to get worsteds in widths of around 60″, or even more.
Day 4
I began today by finishing up the petticoat side seams, leaving openings for the pocket slits. However, as luck would have it I just finished pressing the seams open when I discovered that I had sewn them wrong ways round. Or at least one was wrong, I’d sewn the top of one piece to the bottom of the other. Perfect. More re-doing. I would so have lost my job over this riding habit. I had no choice but to take out the seams and re-do them.
However, although I ripped out the seams, I did not re-do them right away, I couldn’t bring myself to. Instead I went ahead and set a sleeve into the jacket. These are a bit tricky to do because they require making the fabric behave elseways than it wants to. The sleeves are sewn into the jacket by lapping the armhole seam allowance of the jacket body over the armhole seam allowance of the sleeve and sewing together with running/prick stitches. And the jacket armhole did not like being turned under, particularly at the underarm portion. There were a lot of pins involved, and thus a lot of prickings of my poor fingers. This is why it states at the start of the paragraph that I set “a” sleeve in. I (and my fingers) need a break before doing the other.
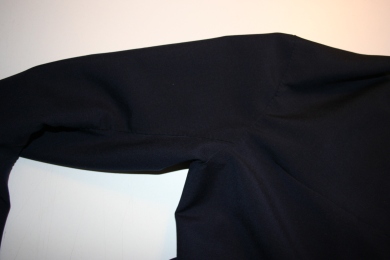
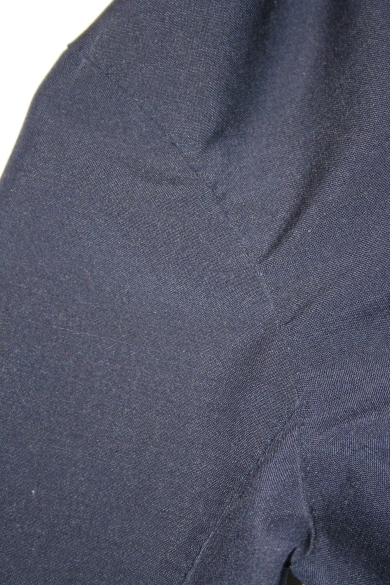
So, I basted the interfacings to the bodice front edges, also due to prickings of fingers and hands while working.
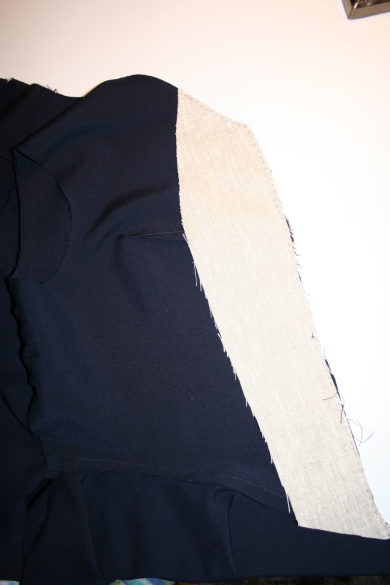
Surprisingly, I was ready to do the other sleeve after only that short reprieve.
So this is what it looks like so far:
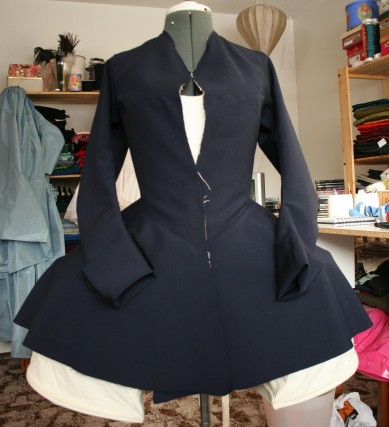
On a real person this does close shut all the way, it’s just that Judy’s bust is not very squishy even with stays.
And that’s some pretty great carpet I’ve got in my apt, eh? You should see the laminate in the kitchen!
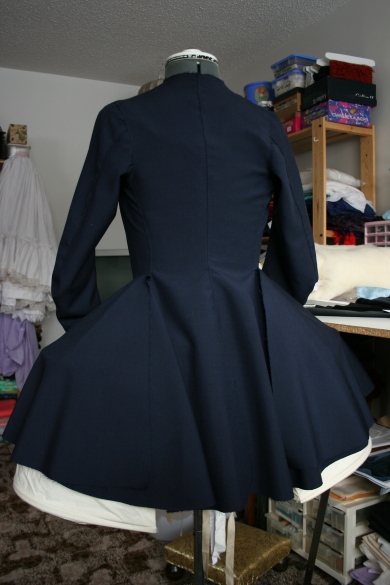
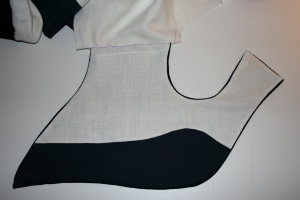
Once the sleeves were in it was more drafting: the false waistcoat front.
I then cut and fabric-pieced the lining pieces for the false waistcoat sewing with small running stitches. I could have cut whole pieces, but thought I would take part in the 18th century practice of fabric conservation!
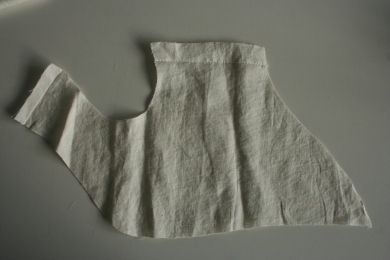
Next I cut the false waistcoat from the co-ordinating velvet, and then the linen sleeve linings.
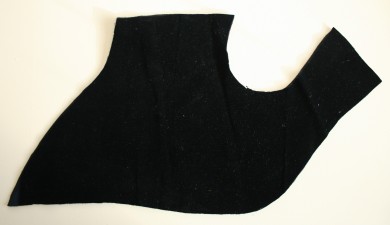
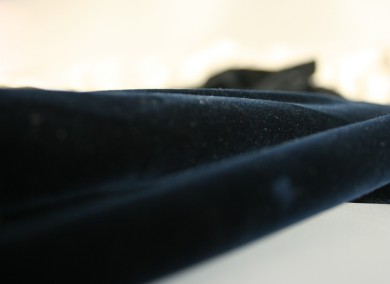
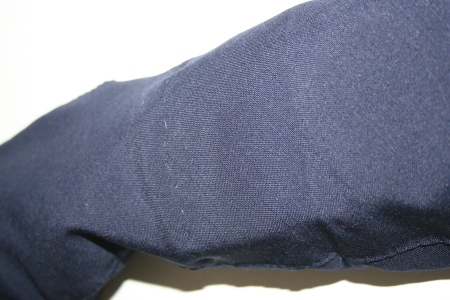
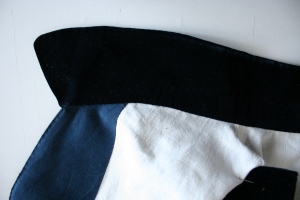
This is to try and give you some idea of the velvet’s texture. It is really pretty luscious, but difficult to photograph. I knew I wanted to use this for the false waistcoat even before I decided on the wool because I think it’s pretty close to one of the types of velvet available at that time. It’s also VERY narrow – like 18-20″ in width, has a silk pile and tightly woven but thin cotton backing – this makes me think that the velvet itself may be pretty old itself, at least from a time before current fabric/fibre choices.
Day 5
I started today by re-sewing the petticoat seams – I’d had a long enough break from them that I was able to bring myself to fix that mistake. Once again, they were sewn with running stitches. The pocket slits were made by turning under the seam allowance twice and continuing the running stitching.
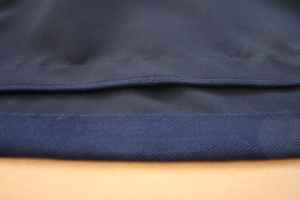
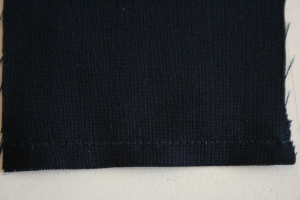
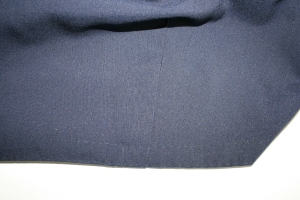
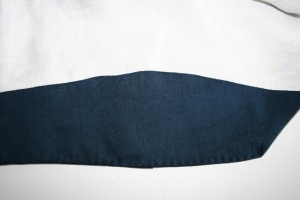
I then sewed the hem binding of wool twill tape to the bottom edge of the petticoat. The binding was stitched to the right side of the petticoat with running stitches, then pressed down.
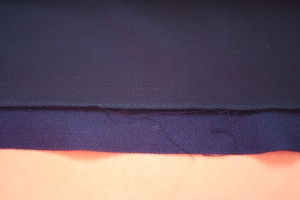
I then pressed the binding up towards the inside of the petticoat and secured it with running stitches. The image shows the finished binding from the right side of the garment (at top) and the underside (at bottom).
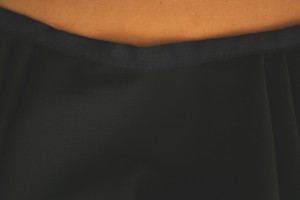
Continuing with binding I moved onto doing the petticoat waist. This was done a little differently. The binding was folded almost in half (left a little longer on the inside). The outer side was stitched first, then the underside, all with running stitch. This is not exactly period-accurate according to what I had observed on artefacts. But it was the only way to get the stitches as small as I wanted. The binding on most garments was a thinner silk or linen tape, but I couldn’t find anything like that for this project. If anyone knows where you can get a silk twill tape I woud be very interested in that information!
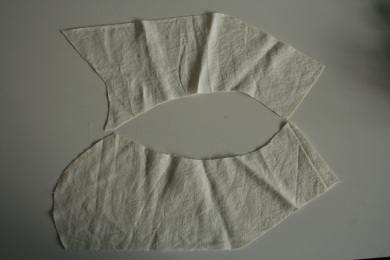
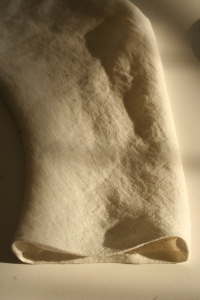
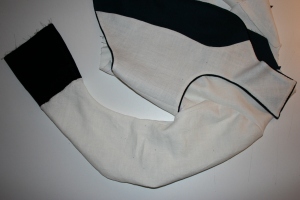
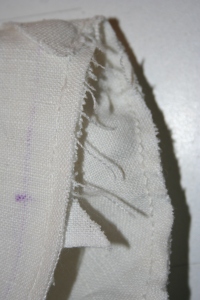
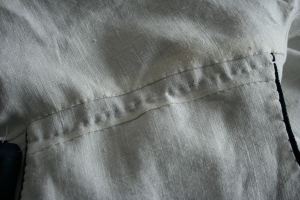
With the binding all done I moved onto sewing the sleeve linings. I sewed them right sides together with running stitches. Sorry the photo isn’t the best, I hope you can still make out some of the stitches.
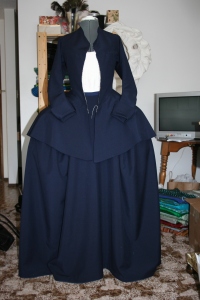
With the binding all done on the petticoat, I could put it and the jacket together and see how it was coming along. It made me pretty excited!
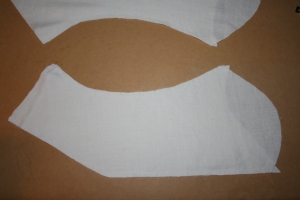
I finished off the day by cutting out the front interfacing for the ‘false’ waistcoat from linen canvas, and drafting and cutting the collar and sleeve cuff pieces.
Day 6
Today was ‘one of those days’. I started by stitching the interfacing to the waistcoat pieces at the front edges with small running stitches. But I did it wrong – I forgot to account for the seam allowance and had to fix it. I didn’t take a picture of how it was wrong, this is how it’s right:
I did the same for the front edges of the jacket.
Then I remembered that the second line of stitching was only for the button side, not the buttonhole side. So, I had to take that out.
Fortunately, after those two flubs things started going smoother.
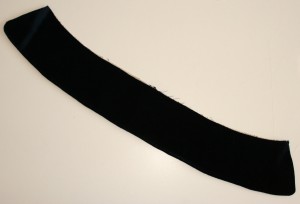
I sewed the centre back seam of the undercollar with backstitch. Looks like my backstitch is slowly-but-surely getting more even!
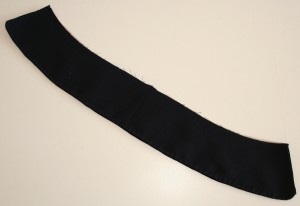
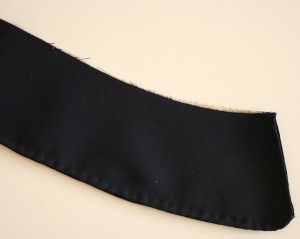
I sewed the collar together, turned it and top-stitched around the outer edge. This was all done with running stitch.
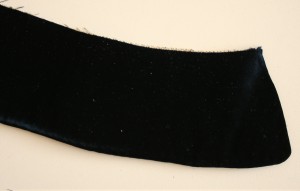
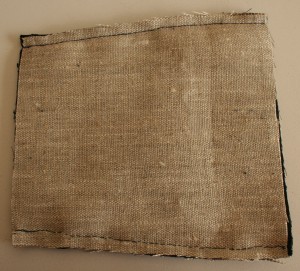
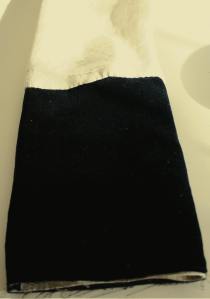
Next came the sleeve cuff pieces, which are onle layer of velvet and one layer of linen canvas as ‘interfacing’.
I sewed the cuffs onto the ends of the sleeve linings. To do this, I turned under and pressed the seam allowance on the sleeve lining ends and slip stitched them onto the seam line of the cuffs (sorry, I didn’t get a good photo of that one).
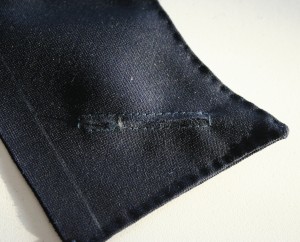
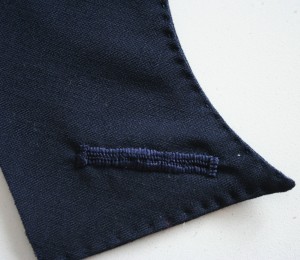
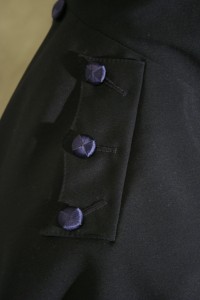
I switched tasks at this point and started working the buttonholes in the pocket flaps. Since I was still new to the whole hand-sewn buttonhole ordeal I decided to start with the pocket flaps (after doing a trial one) since they aren’t seen as much.
I actually used a technique printed in a Threads magazine article for stitching instructions! (I’ll get the issue # and link, if there is one). It was exactly the look I needed, and the instructions were easy to follow (I should’ve known there’d be a Threads shout-out in this project somewhere).
I started by carefully drawing a box according the measurements my buttonholes would have, and then stitched around that perimeter.
I then cut through the line in the centre of the box as far as the buttonhole would be open. Eighteenth century buttonholes on garments like this were both functional and decorative, the buttonhole extended beyond what was necessary to produce the decorative effect of a very long buttonhole line.
Then, apparently, I suddenly had a finished buttonhole!
Unfortunately, I forgot to takes pictures of the rest of the process. The step after cutting the slit was to overcast it with very simple slanted stitches. Then, starting at one end, work the buttonhole stitches to the other end. Repeat for the other side of the buttonhole, then do a few perpendicular stitches at each end for reinforcement and finishing. Go check out the Threads article, it has more pictures! Sorry!
Well then I finished the buttonholes for the first flap, and sewed up the other to get it ready for buttonholes.
Day 7
I started today by working the buttonholes in the other pocket flap. Did I mention before that these are faux pocket flaps? There aren’t actually any pockets, there weren’t on the original jacket either. Those sneaky Georgians!
Next I cut out the facings for the jacket and the waistcoat pieces from a wool/silk blend fabric that I dyed navy blue. I cut the linings for the jacket skirts from the same fabric. I then sewed the facings to one waistcoat lining piece using small slanted stitches and the navy blue silk thread.
I then started making buttoholes on one of the waistcoat pieces.
Then switched back to sew the other facing piece to the other lining piece. I also sewed the facings to the jacket linings, which I don’t have pictures for, but looked mostly the same as the picture above.
To end the day I sewed the pocket flaps to the jacket skirt, and the ‘roll line’ on the collar. I don’t have pictures of either of these (sorry), but they both show up in later pictures so I’ll be sure to point them out then.
Day 8
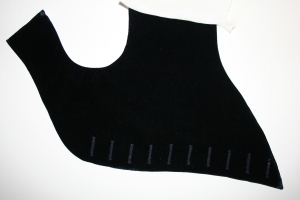
Today I started by finishing the buttonholes on the false waistcoat. Ta Da! (Okay, yeah, one of these two is a bit longer than the other – it happened back then too!)
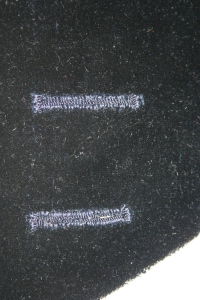
I then prepared for sewing the buttonholes in the jacket and got them started.
Next, I sewed the linings to the waistcoat pieces using small slanted stitches and navy silk thread.
With that done, I next sewed the false waistcoat pieces into the side seams of the jacket lining with a lapped and slanted stitched seam using linen thread.
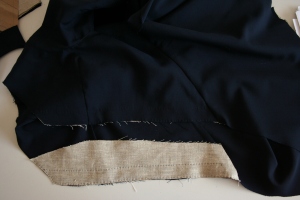
I finished today with sewing the jacket sleeve linings into the jacket lining body. These seams were sewn with right sides together and backstitched all the way around with linen thread.
Day 9
I started today by finishing the buttonholes on the jacket (if one calls a 2-hour task a ‘start’ to the day). You’ll see them in later pictures.
I then fit the lining into the jacket and sewed the sleeve ends/cuffs together using running stitch.
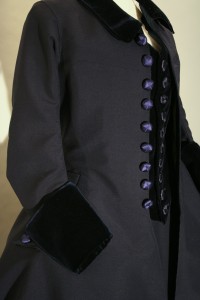
After stitching I folded the velvet cuff piece towards the sleeve so the the seam would not show when the cuff was turned up (this will make more sense soon, I promise).
To hold it all in place I baseted the cuff and jacket sleeve together.
I then sewed the lining to the front edges of the jacket using a small running stitch.
To help secure the the waistcoat fronts to the jacket lining a line of reinforcement running stitch is sewn with linen thread. Perhaps I should have done this before starting to sew the lining to the jacket…hmmmm.
I then lined the jacket skirts (which step is also missing pictures for now I’m afraid). This was done by turning under all the seam allowances of the lining pieces and the jacket skirts, then sewing the lining into the jacket skirts with small slanted stitches using the navy silk thread.
This is how the whole thing looks at this point:
Day 10
This was the last day. All that was left was sewing on the collar. I can’t believe I actually got through all those buttonholes!!
To attach the collar I first sewed the undercollar (wool side) right sides together with the neckline edge, using backstitch. The photo shows it from the inside so you can see the stitches.
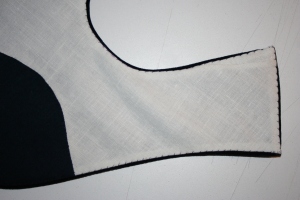
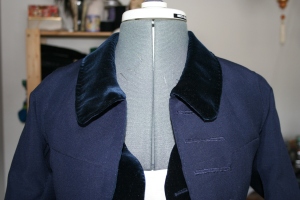
I then folded under the seam allowance of the upper collar (velvet side) and stitched it to the lining using slanted/slip stitches. From my observations of the original garment, I used the same technique for sewing on the collar, and interestingly, it is the same as one of the techniques still used today by home sewers, such as myself!
This is how the collar looks all finished and sitting properly.
Et voila! The riding habit c’est finis!
Oh wait! I almost forgot about the buttons! I haven’t mentioned these yet, but I was working on them throughout much of the process of making the riding habit (and some of the other pieces). I’ll talk a little about them now.
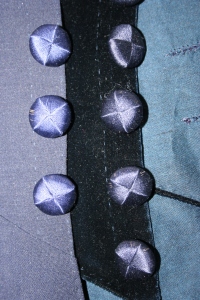
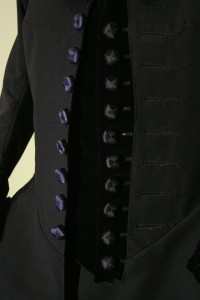
The buttons are made from a wooden form that I wrapped with silk buttonhole twist (a thickish thread). I wrapped them in the same pattern as the original buttons, which were called Death’s Head buttons (no one seems to know why – if you know, please share!). These are one of the most fiddly things I’ve ever done, and I had to do almost 30 of them. I did get better with them after a while, and managed to get my time down to 1/2 hour each. So 15+ hours just for buttons! BUT, I think they look great.
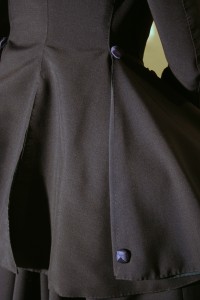
Buttons were sewn to the jacket front, false waistcoat, pocket flaps, and at the top and botton of each jacket skirt pleat.
Oh, and another detail I forgot (there are always extra details. aren’t there?)
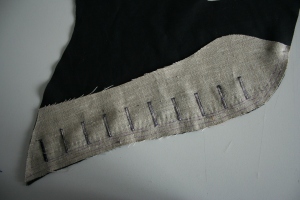
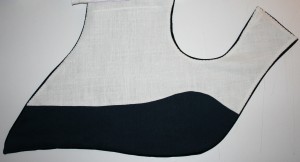
Because the buttonholes were worked prior to sewing in the linings on both the jacket and false waistcoat, a separate treatmment was needed on the interiors of these. This simply consisted of slitting the fabric behind the buttonhole and overcast stitching it to the back of the buttonhole stitching. If it seems a bit shoddy, check out the exhibition page for my theory behind this practice – which I observed frequently on men’s and women’s tailored garments.
Now it really is all finished!
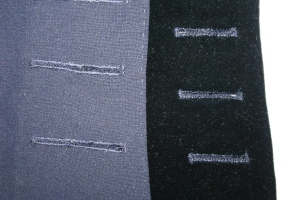
Here’s a closeup of the finished buttonholes on the jacket, alongside those on the false waistcoat.
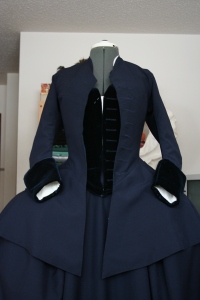
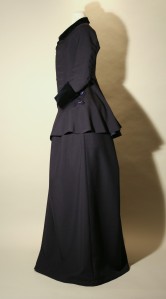
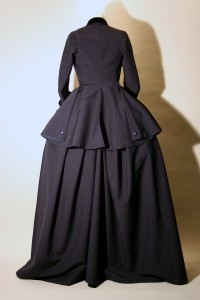
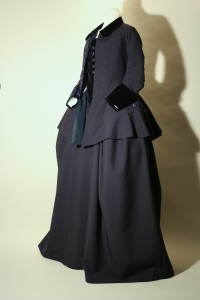
The Money Shots
Here are some studio-setting photos I took of the ensemble after the exhibition was over.
21 Comments »
{ RSS feed for comments on this post} · { TrackBack URI }














LadyInoui Said:
on February 8, 2009 at 13:48
Oh my gosh!! We’re reproducing the same riding habit!!! I’m making mine out of green worsted wool, and gold silk taffeta for the waistcoat. Williamsburg has an almost exact replica of the Museum of London’s riding habit…I’ll be sure to post pictures right away.
Nancy L. Glass Said:
on April 8, 2009 at 06:19
The habit at Williamsburg was copied from one at the Metropolitan Museum of Art in New York. I worked at the Colonial Williamsburg Costume Design Center and reproduced that habit some years ago from measurements of the original. From your sketch, I would say the main difference in the habit is that the false waistcoat has a skirt and the trim on the pocket flaps is repeated on the cuffs and collar.
I am always facinated when I see original pieces that are almost identical. It is indeed a small world.
Your work is beautiful, I can’t wait to see the whole exhibit.
Nancy
Your work is beautiful.
Sara Said:
on April 23, 2009 at 06:16
I can’t wait to see this when it’s done! I would love to replicate a riding habit someday. That velvet does look really awesome, and definately seems like an older fabric. I haven’t seen anything like that around. I envy your work ethic- I have so many projects that I’ve started, but I’m terrible at finishing them. This gives me some motivation to finish my chemise gown.
Carolyn Said:
on May 10, 2009 at 07:01
Well – congratulations to you! I made a repro of this habit, as well, and I did more hand sewing on it than I think I’ve ever done in my life – but the bulk of it was sewn on the machine. Mine is red with black velvet accents, soutache trim, and frogs over the opening (where I cheated with a zipper!!) It is fit to be worn with a corset.
Maggie Said:
on January 22, 2010 at 11:16
I’ve been following your blog for a little while since I love 18th century everything. I adore riding habits and I love what you’ve done! I really want to make one. Maybe one day! The buttons you did are really cool! 🙂
Zip Zip Said:
on January 27, 2010 at 19:50
Good heavens, you’ve done it again. A lovely garment, the making of which you documented beautifully. What a superb, kind resource you have been to those of us who hand sew!
Hallie Said:
on June 17, 2010 at 07:08
Wonderful work, and a great job of keeping up with your blog with good photographs. I am not sure how you will feel about something that I ran across, but since this website has in the past “borrowed” my work as her own, I thought you would want to see this.
http://www.etsy.com/listing/33749398/colonial-riding-habit-womans-18th
Susan Said:
on September 30, 2010 at 12:15
The “mistake” you made in the beginning, where you ended up with a crease across the bust – I’ve seen that actually darted in on other habit jackets (But I suppose it doesn’t do any good for me to tell you now…).
brocadegoddess Said:
on October 22, 2010 at 15:34
Hi Susan,
I observed the same thing on habits I looked at, and do actually have such darts in the habit jacket. The issue was more that the fronts didn’t meet, it was too small!
Thank you for telling me about seeing this on other habit jackets, however. Would you be able to tell me in what museum/collection(s) you saw this? I want to do more research on construction of women’s 18th c riding habits in the future because of a theory I developed. It would be very helpful to have additional known locations to try and visit.
Thanks for the comment!
Kendra Said:
on October 29, 2010 at 14:48
Hey Carolyn! I’m contemplating making a riding habit soon-ish, and am wondering whether you’ve found any documentation for when/whether they were worn over side hoops, as you have yours? I’ve seen very early pictures (1720s-30s) where there are obvious side hoops, but the later ones (1750s-70s) it’s harder to tell! Maybe it’s that some do fit over hoops and some don’t, or the ones that look like they don’t are just small hip pads… but any info you might have would be appreciated!
Penny V. Said:
on September 1, 2011 at 20:39
I am not Carolyn, and I may get this all wrong, but here is what strikes my mind with your question.
Out of a simply practical point of view, if the outfit were to be used for equestrian sports, it would make sense to have padded hip rolls or some such, from a practical point of view.
If you are going for the shape of the outfit for appearance and not riding, panniers may be considered. A lot of portrait paintings and drawings of the era are painted to emphasise the fashionable conical shape of a lady’s torso, There are surviving corsets from the era, where the average measurements suggest most women did not cinch their waistlines in as tightly, and the cut and colour of clothing was used to create an optical illusion of a slimmer figure, with slightly or even dramatically darker side panels in the bodice. The same applies to the profile of skirts, which may not be quite as wide as portraits present them as. An artist may have taken liberties by creating billowing or some such for artistic effect.
I hope your project goes well.
– Penny
Penny V. Said:
on September 1, 2011 at 20:43
To add to my own comment, in Victorian era photographs, it was common for a lady to wear a hoop skirt under her riding habit to create the fashionable profile of her day, while for riding, the crinoline would of course have come off.
http://www.corsetsandcrinolines.com/tidbits.php?index=13
The author of the site has an extensive collection of photographs from the Victorian era, and knows a lot about the fashions and what went under clothing.
– Penny
Penny V. Said:
on August 31, 2011 at 19:18
That is a fabulous reproduction piece.
What caught my attention, was you mentioning having issues with the drafting of the bodice brought me to pointing out something that is obvious to me, but may be good to share.
Meredith Wright, author of “Everyday Dress of Rural America, 1783-1800” emphasises that to tailor men’s jackets of the time (not quite the same as yours, but stylistically still tangential, especially with the tailoring techniques of the day not changing as fast), you should start with a muslin, then use the lining fabric to cut and fit the first version of the jacket, and then use the lining, not your muslin, to cut the fabric for the bodice.
I’m hoping to get my hands on a couple of dress forms to ease construction before I get into complex projects, but right now, I’m happy to be able to construct some easier pieces, like underpinnings for a more elaborate outfit.
Considering the cost of material in the days, this may be a valid point.
I would love to see some sort of button tutorial. The buttons really bring the understated elegance of this habit to a new level. 🙂
brocadegoddess Said:
on August 31, 2011 at 22:05
Dear Penny,
Thanks very much for your comment. Using the lining as a basis for the garment pattern certainly has a historical precedent; I probably should have followed it and will try to remember for next time! Had I been simply making it for myself, I would definitely have muslined (I do it all the time for my own, personal, sewing); however, I have found no evidence of the practice of making muslins in the 18th century, materials were likely too dear. Does Meredith Wright’s book provide evidence of this practice being used in the 18th century, or is this simply advice for the modern costumer (which I was not aiming to be for this project)? If the former, I’d be very interested in reading what she has to say. Perhaps I’ll go check out my university’s library soon to see if we’ve got it!
Thanks again,
Carolyn
Penny V. Said:
on September 1, 2011 at 20:29
Thank you for your reply, Carolyn.
I have to apologise for being unclear, I wrote my initial comment in a slight hurry, and didn’t bother opening the book first. Essentially the lining material is what would have been used as a muslin, if a lining material was in use, as the lining was often the cheaper material.
For thrifty seamstresses in even our modern times, saving the cutting of the best, most expensive material for last, after the final modifications are done, is of course a sensible choice. (My corsettier, who is a highly skilled artisan of the old school craftsman breed, does multiple fittings with a fully boned muslin mock-up before cutting a single scrap of the final material, for example. I am not as meticulous as M-P, but she makes a living with her work, I don’t.)
The book references a particular time period in the history of the Americas, where the fashion outside large ports like New York and Boston were both “behind” in fashion, and put a practical spin out of both of economic and climate-prompted necessity. So this is not the fancy upperclassy clothing your riding habit is of. However, the sewing techniques are generally the same, as during the earlier part of the century in Europe as well.
Merideth (the spelling is with an i in the book, so I think my brain short-cirquited and assumed a more modern spelling before…) says, verbatim, (p.76)
“Make a full size tissue paper pattern adjusted to the measurements of the wearer, plus seam allowances. Use it to cut out the lining material. Baste together and try on over the appropriate undergarments. Adjust to fit, mark the stitching lines, take apart and press. Use the adjusted lining pieces, not the paper pattern, to cut out the outer fabric. […]”
She also brings up the fact in her introduction and guide for reproducing dresses presented in her book, that the clothing of that era is lacks modern tailoring elements like darts and gussets, gathering or pleating. Of course outfits like the Robe à la Française in court use have, according to multiple examples, the pleated trains, but this tailoring technique would have been unavailable to most middle class and working class ladies.
The reason I picked up the book, is that a majority of costuming resources available always chronicle the fashions of people who could afford having their portraits painted. What fascinates me more, is to find out, what was worn outside the noble houses of the era.
I cannot claim expertise in everything, but I have been addicted to finding out more about what men, women and children wore in the old days. This fascination means my collection of literature on the subject keeps growing every time I can afford to buy more books. My great fascination with underpinnings started probably, when I found Victorian era corsets in their original boxes and old fashion journals of the era at my grandmother’s place. They’ve archived everything, and have a sizeable collection of correspondence between family members starting in the early 18th century.
– Penny
stephen odianose Said:
on October 30, 2011 at 19:30
splendid
Patricia Black Said:
on March 12, 2012 at 12:46
You do such lovely work! I’m working on a Frock Coat for my son, made from black denim and a deep red velvet, soI know about velvet troubles! I signed up for ‘The Sewing Guru’ website, for help with the pockets. http://www.sewingguru.com – it’s less than $10 dollars American per month, but you CAN join ‘by the month’, and take a lot of notes on whatever subject is vexing you. Thank you for sharing your beautiful work, and your knowledge.
Nancy R. Said:
on August 7, 2012 at 13:36
“Death Head Buttons Their Use and Construction” are available from Burnley and Trowbridge and Wm Booth Draper, among other places.
Elizabeth Huck Said:
on August 7, 2012 at 15:24
Its beautifull well done you!
Lindsay Said:
on December 27, 2015 at 12:53
Hello there! I am new to sewing and I was wondering if there was some kind of pattern I could use to get myself started? This is a beautiful riding habit!! My email is Lcarlson703@gmail.com
lotte Said:
on December 7, 2016 at 16:02
Hi there,
Your riding habit looks beautiful and I adore the use of the darker velvet. It would be extremely helpful if you could tell me how much fabric you used to make this jacket and if possible it would be amazing if I could possibly have a copy of your pattern? (if this isn’t possible that’s absolutely fine but knowing the amount of fabric would help me hugely)