Nightgown
The “mantua” developed in the latter part of the 17th century (c. 1670s-80s). Here is an example from that period at the Costume Institute at the Met.
The third quarter 18th century Nightgown looks quite different from, but is an evolution of this earlier style and seamstresses were as “Mantua-makers” into the 19th century. Many people may be more familiar with its french name, the “Robe a l’Anglaise”; however, since I am locating my project in England, I stuck with the English apellation.
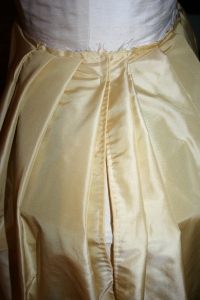
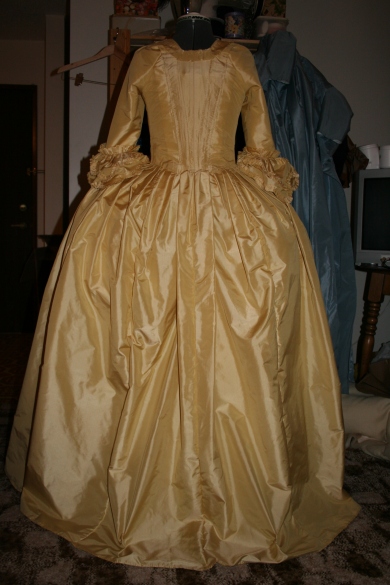
What makes an 18th century Nightgown distinctive is its fitted back. Until the later 1770s, these dresses were cut and constructed in a style referred to as “en fourreau” (I don’t know it there is an equivalent english term, I haven’t run into one yet). This is characterised by cutting the centre back portion of the dress in one with the skirt:
This photo shows a 1770s gown, by which time the ‘en fourreau’ back was being cut and pleated quite narrowly. This continued until the bodice and skirt were cut completely separately by 1780 (probably starting a little earlier). Mid-century garments have a wider section of pleats, like the example I am reproducing.
The Nightgown I am making is one of the most direct replications of this project. I fell in love with one in particular that is part of the (former) Snowshill collection, now housed at Berrington Hall, and which is featured in Costume in Detail by Nancy Bradfield (as you will see below!). While at Berrington (btw, the curator of the collection, Althea MacKenzie, is an absolute peach! She could not have been nicer or more accommodating – big shout out to her!!) I had the opportunity to draft a (not quite complete) pattern of the dress which came complete with not one, but *two* stomachers, but no petticoat (oh well, can’t have everything). The original dress is made of a silk and wool blend that I tried and tried but could not find, I fear it may not be made anymore. The colour is an incredibly saturated mustard yellow, similar to this sack back gown:
Here are the specs and the pattern draft for the particular example I am replicating (mostly):
This technical drawing accompanies the accession file for the dress.
The two pictures below are pages from Costume in Detail that feature this garment:
And here is the pattern I drafted from my own examination and handling of the dress (you’ll want to click on them to see them properly):
Materials:
– butter yellow 100% silk taffeta
– bleached plain weave linen scraps for bodice and sleeve linings
– matching yellow silk thread
– white linen thread
– yellow wool tape for petticoat waistband/ties and hem binding
Day 1
A good deal of today was taken up with cutting. I cut the silk for the dress pieces, including sleeves, and linen for bodice front and side and sleeve linings.
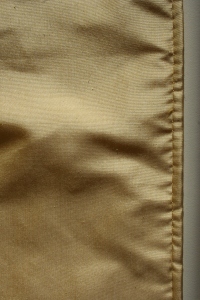
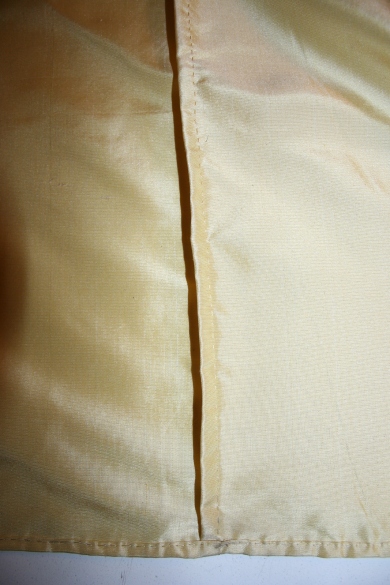
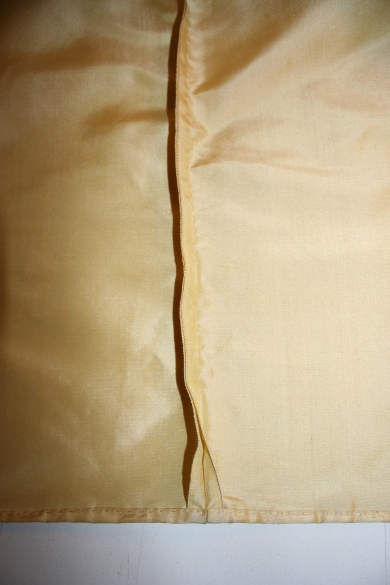
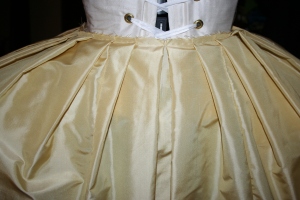
The first seam I sewed was the dress skirt centre back. This was done sewing selvedge to selvedge using a running stitch.
As seemed logical, I then sewed the centre back bodice seam. Although much shorter than the skirt seam it took at least as long to complete because it is sewn with quite small back stitches, which I actually like in small doses. If the entire garment was sewn with them, I think I would go crazy – I guess 18th century seamstresses might have felt the same way!
Once the centre back of the dress was all taken care of I then sewed up the rest of the dress’s skirt seams. For the sake of playing around with variety and time consuming-ness two of these seams have the raw edges folded under twice to neaten them, and are slip stitched. The other two seams have the raw edges folded under twice and are running stitched. FYI: the running stitches took significantly less time than the slip stitching.
Day 2
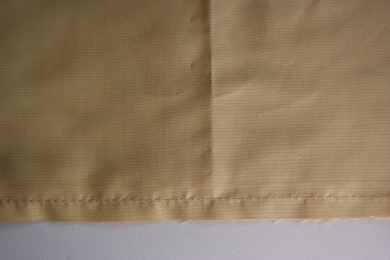
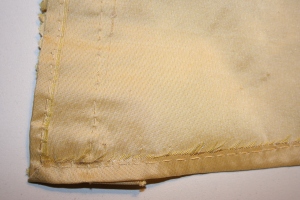
I started off today with hemming the dress. This was done by turning under the raw edge twice and sewing the hem down with running stitches. I sewed from the underside of the skirt, and consequently may have left overly large stitches on the right side of the garment compared to those I have examined. An ‘oops’ on my part, but not one that I think warrants taking it all out and doing it again (read: I don’t have time for that, and it would make be want to gouge out my own eyes!).
I then hemmed/finished the front edges of the skirt by simply turning the selvedge edges under once and sewing with a running stitch.
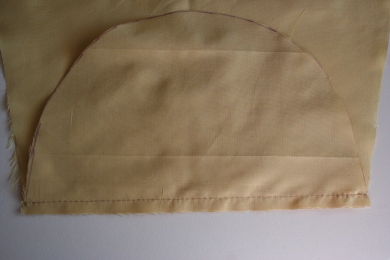
It was now time to start on the bodice, but I needed to start with the bodice lining – as was the order of production in the 18th century. The front and side bodice lining pieces were cut using the same pattern pieces as for the silk, however I could not do this with the centre back as the silk and linen layers are quite different. Since the silk gets ‘mounted’ onto the linen lining, that had to come first. Therefore it was necessary to draft the pattern piece for the bodice centre back lining from scratch. Since I do not have a “client” I’m making this for and thus no body to draft the piece on, I actually decided to use the centre back bodice portion of the silk to help me. I pinned up the back pleats to make the centre back into the shape it needed to be.
Once the pattern piece was drafted, and the linen cut I could sew it up – which I did, using running stitch sewn with linen thread. I then sewed on the other bodice pieces by lapping the seam allowances and sewing with slip stitch, again using the linen thread.
(Perhaps not the best photos, although there is a certain arty-ness to them I suppose. Guess I should have used the flash, hm)
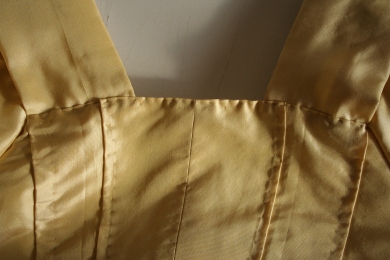
I pinned all the silk bodice seams together, then pinned the whole to the linen bodice to check how they fit together and prepare for sewing them together.
Sewing the two layers together proved tricksier than I had anticipated. I sewed down the pleats on the right-hand side of the centre back, but think I may have to re-do them. I did not double check with my photos of the original garment, and I think the spacing of the stitching is not quite right, too close to the folded edges. This was “oops” worthy of re-doing. I think even the pleats themselves need to be altered so that they taper more at the waist. I did get the other bodice seams done and they’re fine (whew!) They’re sewn with small slip stitches that go through all layers.
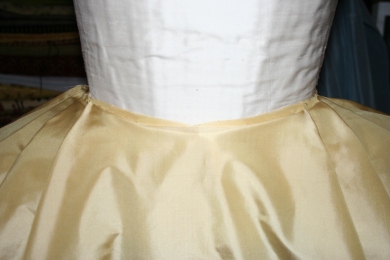
I decided I did not want to deal with ripping out stitches today, so I sewed the bodice to the skirt at the waistline. This was done by turning under the bodice waist seam allowance and stitching the fold to the skirt with very small (I tried to get very small) slip stitches.
Day 3
Due to scheduling issues, today had to be a half day, so not as much as usual was accomplished (I just wanted to explain that so you all know I didn’t just slack off)
The first order of business (now that it was a new day and I felt equal to dealing with it) was to re-adjust the back bodice pleats to match the original garment better.
That done, I went ahead and sewed the pleats down using a sort of prick stitch that looks like long running stitches on the underside. I then finished up a bit of waistline sewing at the centre back.
I was then able to move to the front of the bodice. There is a dart, like a larger version of a “fish dart” at the upper front corners of the bodice. I sewed the linen and silk layers as one, and constructed the dart by folding one side of it onto the other and top-stitching it down with running stitches.
Day 4
Today is another half day to try and make up for the half day lost yesterday. However, later in the afternoon a friend came over to do buttonholes on my machine (someone ought to use the poor thing since I can’t!), so I was less than thoroughly productive for the last couple hours. Ahem.
I started today by finishing the bodice front edges. This particular example has robings that are sewn on seperately, not cut as part of the bodice front. Thus, the front edges are finished by simply turning the raw edges of both silk and linen in towards each other by about 1/4″ and sewing the together with smallish running stitches. I used the yellow silk thread for this, the silk thread takes priority when it comes to sewing the two different fabrics together.
I then finished the bodice lining by turning under the bottom edge and slipstitching it to the waist seam in the silk.
However, the bodice back pleats were not done giving me trouble. I noticed that they were not lying flat on one side after sewing the lining waist seam, the lining had pulled or something. I thought it would be fairly easy to make to layers lie smoothly with each other when the sewing was done by hand, but it seems almost as tricky as with machine sewing. Hum.
The result of this was that I restitched one of the back pleats, and part of the lining waist seam. I really hope it all behaves itself properly from now on!
It was time to move on again, and so I cut out the robings. The original garment has interesting robings that are (as mentioned above) seperate pieces from the bodice; they are also lined with linen. This was the only garment I examined that I saw this on; however, who knows (yet, I haven’t seen everything there is to see…….yet) how common this may or may not have been. So I cut out pieces of both silk and linen for the robings.
The robings are constructed by folding the silk over the narrower linen strip, and sewing down with slip stitches. The end that will lay on the bodice front is finished by tucking the raw edges up inside itself and sewing them shut with small slip stitches. I should probably note here that I only got one robing done today, the other will have to wait a bit, I need to move onto something else first (it was a little tedious).
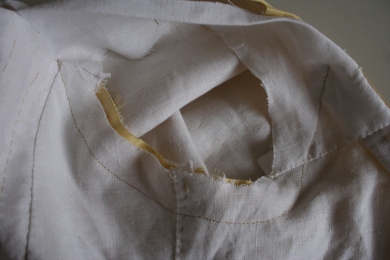
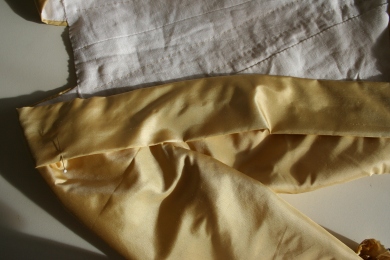
Another pattern piece I did not get to drafting was the linen shoulder straps, onto which the sleeves will be mounted. I figured these out by draping the garment (such as it is thus far) onto my Judy (what would I do without her!?) and taking some measurements. I cut out rectangles according to said measurements and stitched one end to the inside of the bodice fronts.
Day 5
Today I was a little under the weather, my insides were doing some funky things. So after a few hours the day turned out to be pretty much a wash. I will have to make up the hours elsewhere, hopefully another day this week.
However, I did get a few things done:
Using the robing as a guide by pinning it into place on the bodice front edge I trimmed the linen shoulder strap to the proper length (I’d cut it a little long). In making the original garment, 18th century seamstresses would have done this the other way around. They would have draped the linen shoulder strap on the actual client during a fitting, and then have determined the length of the robings. I do not have a client to drape things on (much as I love Judy, she doesn’t always cut it), so I had to improvise a titch.
I then sewed the shoulder straps to the back neckline of the bodice lining, and voila! armholes appeared!
Where there are armholes, sleeves are sure to soon follow. I stitched up the sleeve lining seam, lapping the seam allowances slip stitching with the linen thread.
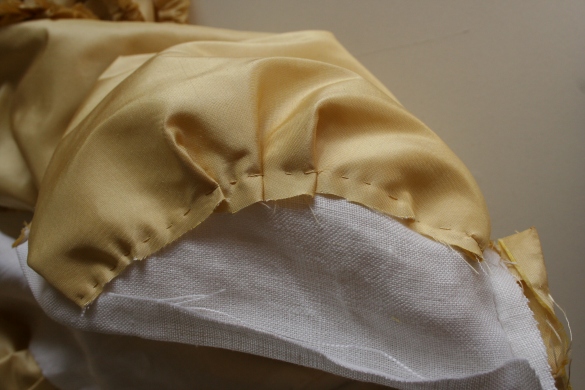
I then mounted the silk sleeve pieces on top of the linings, lapped those seam allowances and prick/running stitched the seam through all layers (including the lining). I left 1″ of the seam at the lower end of the sleeve unstitched for now in case it needs to be turned under for finishing.
Once the sleeves themselves were done, I started pinning them into the armholes – not the easiest task ever. I think I had them backwards at first – I switched them around and they seemed to fit a little better. It was at this point that I gave up for the day – there is still more fiddling and figuring out to do before the sleeves are sewn in, I’ll leave it for a day when I’m up to battling them.
Day 6
Today was a day of working on a number of different tasks, with no particular order in mind or dictated by history.
I started with the quick job of drafting the stomacher pattern. Next I trimmed off the other linen lining shoulder strap.
The first lengthy task of the day was to sew up the other robing (see above for a photo).
Then, using the pattern from the sack dress I cut the petticoat.
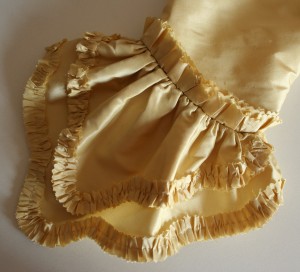
Next I drafted and cut the falling cuffs (ruffles) for the sleeves. Like I said: there is really no method to the madness today, it’s just all over the place – but getting things done!!
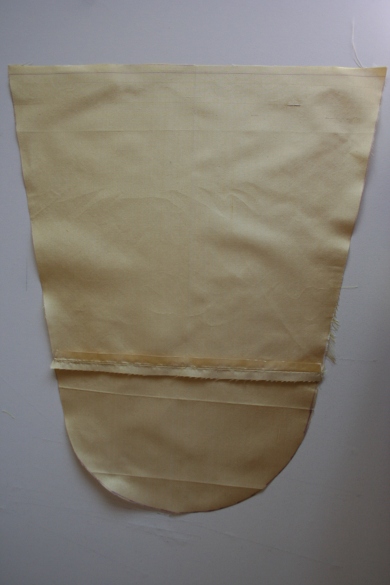
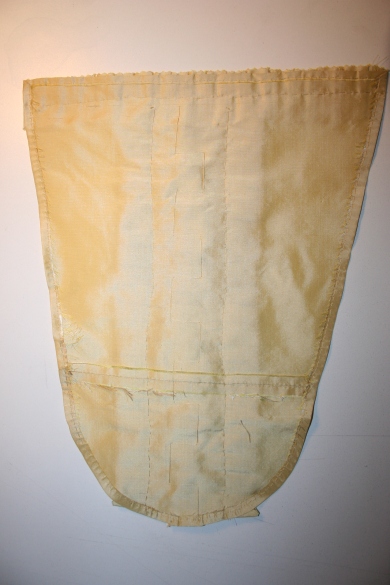
Then I cut the stomacher, and because I was running out of fabric had to piece it together. For this I used small running stitches and then pressed the seam open. I was actually rather pleased by this since the original stomacher, and so many parts of original garments are pieced. I felt like I was properly engaging with historical practice in having to piece fabric out of necessity! Yayy!
Next I finished the edges of the stomacher by simply turning them under once and sewing down with running stitches that are small on the right side and longer underneath. I simply left the edges raw like the original stomacher. I’m finding allowing myself to leave raw edges to be one of the most difficult aspects of this kind of sewing!
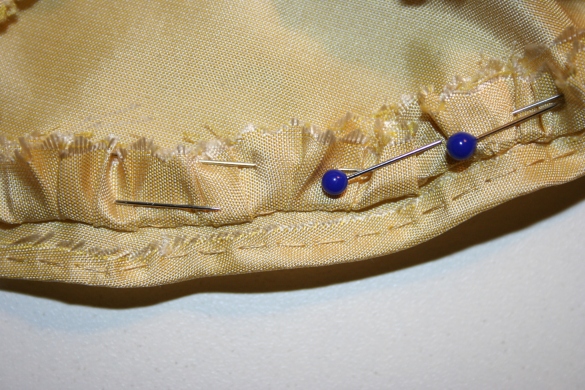
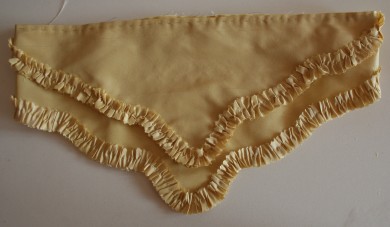
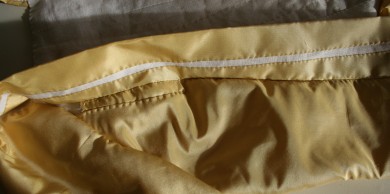
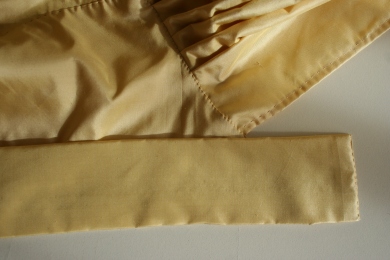
I then hemmed the lower edges of both layers of the falling cuffs (ruffles) by turning them up on the right side about 1/4″ and securing with running stitch. As this picture was taken after the trimming was applied, you can see that it conceals the raw edges.
Next, because it was oh-so logical, I sewed up the false fabric join seams in the petticoat, using small running stitches.
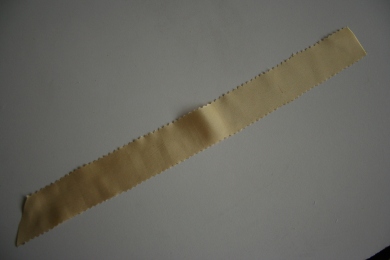
I then cut out the self-fabric trimming strips for the sleeve cuffs, and learned why I should really have left-handed pinking shears: the ones I have gave my thumb a big nasty blister! Stupid right-handed world! Perhaps I should have looked for period-styled pinking shears, which would likely have been neither right nor left oriented.
I pressed on however, to gather up and press flat the first piece of trimming and even stitched it to the cuff!
Then I was good and done for the day.
Day 7
I started today by finishing making and applying the trimming to the sleeve cuffs, and I just LOVE them!!! Squeeee!
I then cut and pieced the sleeve trim pieces, gathered them, folded them in half and pressed them flat. I pinned the fold to the lower edge of the sleeve (which I ended up cutting 3/4″ shorter than the linen sleeve lining) and attached them with a row of basting stitches
Next I pinned the cuff to the sleeve over the ruched sleeve trimming, gathered them up and stitched them down with long backstitches.
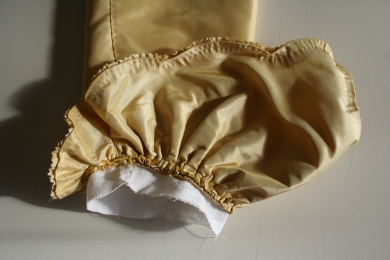
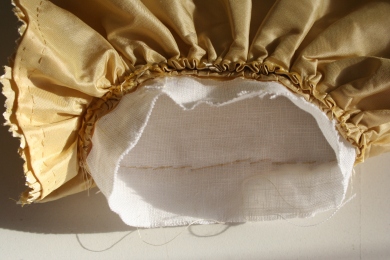
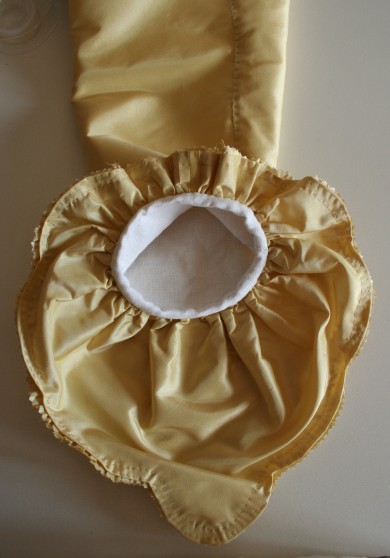
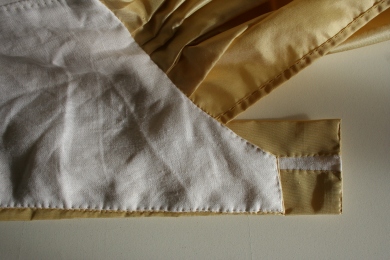
The sleeves are finished the same way as on the original garment, which is a technique I’d not seen before or since. The linen lining is turned over the seam allowance of the sleeve, sleeve trim, and falling cuffs and stitched down with slip stitches, thus creating a self-binding effect. How charming is that!?
Now that the sleeves themselves were done, I switched to the petticoat for a while before tackling setting the sleeves in. I sewed one side seam of the petticoat and the pocket slit. However, at this point I realized I had sewn one half of the petticoat top to bottom with the other, and so had to take out all that stitching – ugh.
At this point I took a little break for the sake of my sanity and the garment’s well-being.
I then returned to work and rectified my mistake. I even continued on to finish both petticoat side seams and pocket slits! Hooray!
Day 8
I began today with a little bit of fitting – still trying to get the linen shoulder straps to fit right. I tried the garment on over a set of stays and ended up altering the shoulder straps by shortening them 1/2″ and then resewing them in the same manner as before.
I then felt ready to take on setting in the sleeves. I sewed the underarm portions of the sleeves first using backstitch, as was customary in the 18th century.
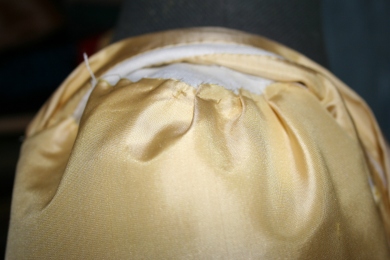
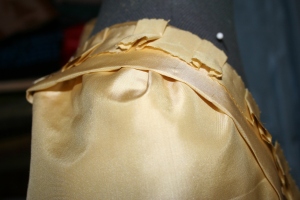
I continued straight on to sew down the tops of the sleeves by pleating them thrice and tacking them down to the linen shoulder straps with a combination of running and back stitches.
After the sleeves went in I was able to finish the back neckline of the gown, which was done by turning the silk and linen layers down towards each other and running stitching the folded edges together.
I attached the robings next by sandwiching them between the silk and linen lining layers at the backs of the shoulders and sewed through all layers with small running stitches.
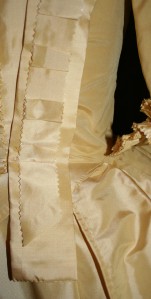
I cut the self-fabric trimming strips to decorate the robings (aggravating my poor blistered thumb in the process), box pleated them up and stitched them onto the robings with very small tacking stitches.
This meant that the dress itself was now finished!!!
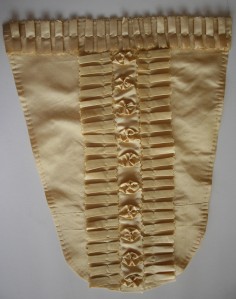
I was so excited that I started trimming the stomacher with self-fabric pleated strips according to the same design as one of the original 2 stomachers that survived with the dress.
Day 9
I started off with finishing the trimming of the stomacher.
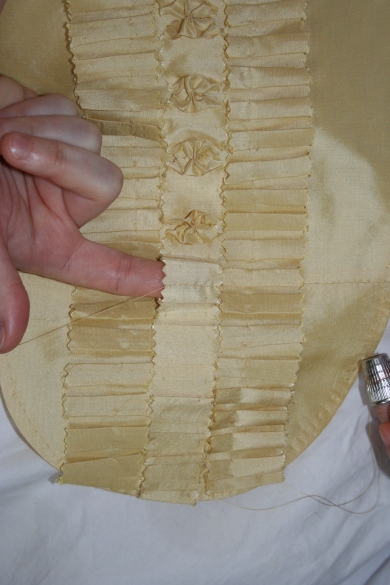
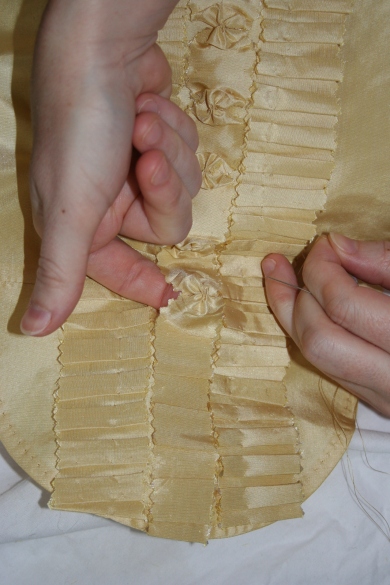
I am including a rough tutorial for how I managed the effect on the central band of trimming:
1. I pleated up the strip with medium-sizd box pleats and pressed them.
2. I then tacked the strip down to the stomacher between the box pleats.
3. pushing a finger under and through a box pleat I made a row of small running/basting stitches.
4. I pulled up the basting stitches and tacked the gathers together with several stitches to secure them.
5. Finally, I simply pushed the box pleat back down again along its pressed lines
et voila!
So at the end of the previous sewing day I thought the dress was finished – I wasn’t quite right about that. I tried it on today and discovered that the sleeve cap pleats were much too far towards the back. I therefore had to pull out the stitching, adjust the pleats and sew them back down again.
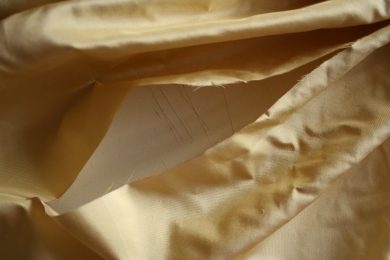
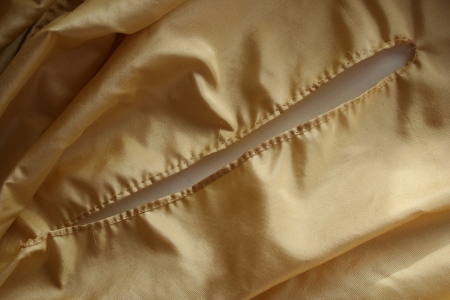
I then tackled an element I had been avoiding since the beginning: the pocket slits in the skirt of the dress. You might ask: how come? Well, for the simple reason that the original pocket slits are not in a seam or at selvedge edges of the fabric – they are literally slits cut into the fabric. So wouldn’t you be a little nervous too?
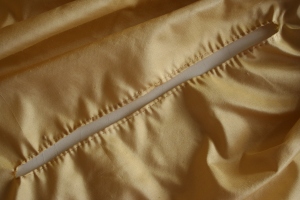
However, it had to be done. I measured out the placement of the slits according to the pattern I’d drafted from the original garment and…….cut. That was actually the easy part. What I was more afraid of was the finishing: the edges are simply turned under twice and running stitched; and you just deal with the top and bottom corners are best you can, there may be some raw threads, but that’s just life I guess.
And they turned out just fine, thank goodness!
All that was left was to pleat and finish the petticoat waistline and hem. I pleated and basted the waist, but am still waiting for the linen tape to finish it with. I hemmed the petticoat by turning the raw edge under twice and sewing with running stitches that are smaller on the right side and longer underneath.
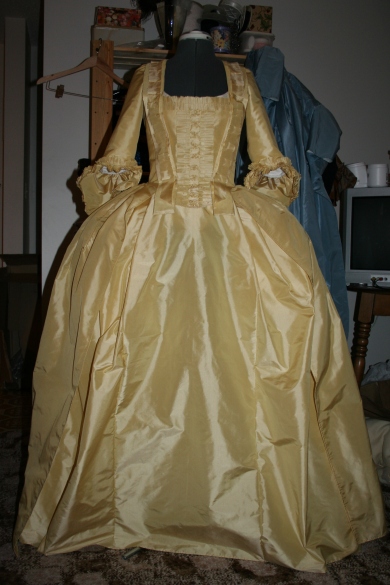
So here is the ensemble put together – the first one to be pretty much all done!
36 Comments »
{ RSS feed for comments on this post} · { TrackBack URI }





Julia Said:
on October 24, 2008 at 23:06
I love that the second stomacher is a false compere! It’s like she was hedging her bets!
brocadegoddess Said:
on October 25, 2008 at 07:19
Huh, I hadn’t seen that stomacher in that way, but you’re right that it does kind of look like a false compere. Supposedly it’s rare to have 2 stomachers for the same dress. I don’t know if that means it’s rare for them to have survived, but was a practice of the time, or if it’s believed this was only rarely done.
The dates given for the dress are 1755-75, and is unaltered; from what other clues I’ve observed I have a feeling it dates to the latter portion of that span, which would make a false compere option make more sense. Perhaps it was made clost to 1770 or so during a transition phase.
Alternatively, no petticoat for the dress appears to have survived, so maybe this stomacher was made from its fabric at a later date?
Julia Said:
on October 25, 2008 at 20:50
That would be my guess. The first stomacher looks more 1760s, like the trimming on the dress, whereas the compere front suggests a less formal, less frilly option, like her wearing the gown with a contrasting petticoat (quilted, perhaps?). The rest of the fabric might have gone to make a child’s dress or something.
It does make me wonder why gowns survive more frequently than petticoats or stomachers do… What happened to that stuff? Where is the petticoat-and-stomacher graveyard?
Julia Said:
on October 25, 2008 at 20:52
That would be my guess. The first stomacher looks more 1760s, like the trimming on the dress in the first picture you have, whereas the compere front suggests a less formal, less frilly option, like her wearing the gown with a contrasting petticoat (quilted, perhaps?). The rest of the fabric might have gone to make a child’s dress or something. Orrrr…. (I’m making this up) she bought the fabric, and there wasn’t enough to make a petticoat after all, so she made two stomachers to mix them up for different occasions? We will never know!!
It does make me wonder why gowns survive more frequently than petticoats or stomachers do… What happened to that stuff? Where is the petticoat-and-stomacher graveyard?
brocadegoddess Said:
on October 25, 2008 at 21:31
Well, my guess is that petticoats were harvested for other uses, as you suggest. Perhaps particularly around 1770s and afterwards when a fashion for wearing contrasting coloured petticoats took off? Perhaps dresses/gowns themselves were seen as more worthy of maintaining as a garment?
As for stomachers – I have wondered pretty much the exact same thing as you. What happened to them? They surely would have been much more difficult to use for something else, except maybe crazy quilts. Hey, maybe that’s it – crazy quilts are the stomacher graveyard! Or maybe because they were small-ish they just got lost?
Cathy Hay Said:
on November 14, 2008 at 11:00
silk wool, fyi:
http://www.fabrics.net/outlet/Detail.asp?ProductID=1874
brocadegoddess Said:
on November 14, 2008 at 11:35
Thanks for the tip! I’ve just ordered their silk/wool swatch card. Have you seen this fabric in person? There is a particular texture that I would be looking for.
LadyInoui Said:
on November 17, 2008 at 19:34
Wow! I love this! I have a question for you – I used pinking to finish the trim on my Robe francaise, and the taffeta has been raveling like crazy. Did you do anything special to prevent this on your gown, or can you recommend anything? I love the look of pinking, but mygown is starting to look very shabby.
brocadegoddess Said:
on November 19, 2008 at 21:11
For this particular example I just used my regular pinking shears (my poor thumb!) since the original garment was pinked the same way. I didn’t do anything special to the fabric to keep it from fray, it will or won’t. Original examples I saw that were pinked this way were rather frayed and shabby-looking at those spots, I don’t think they did anythig special either. Can you trim the pinking manually to neaten it up? It wouldn’t surprise me if that was done in the 18th century – what else are ladies’ maids for?
However, for the sack and pet en l’air I will be using a scalloped pinker from William Booth, Draper to do the edges of sleeve cuffs and trimmings. From what I’ve seen of originals treated this way, the fraying and tattiness was much less.
Stella Said:
on December 9, 2008 at 19:08
Thank you so much for sharing this! I’m about to start making a mantua for myself and I’ve found this page really helpful. I didn’t know about the en fourreau technique before, and your pictures are excellent.
Cheers
Stella
brocadegoddess Said:
on January 7, 2009 at 00:05
Dear Stella, I’m so glad that this has been of actual use to you in your own endeavor! Very best of luck with it, I hope you enjoy both the process and wearing it!
Koreen Dowdell aka. Mummy Said:
on January 14, 2009 at 06:43
I’M VERRY VERRY IMPRESSED!!! I’m blown away by the incredible detail of the construction. It is no wonder that the clothing of that century has lasted so long. Far longer than what is produced today. (except for polyester – it never dies!!!)
The closest I ever came to producing a significantly detailed garment was your flowergirl dress but at least I had the good old Singer and did not have to construct it by hand.
I particularly like the rosettes and the pleating on the stomacher and the sleeve fuffles – all that pleating. I am indeed impressed and very proud of you.
cazonetta Said:
on September 1, 2009 at 16:59
Wow! Absolutely beautiful! Very, very well done! You are one of a very few I have known (besides myself) who has pursued making the mantua. I’m particularly loving the detail work in the back.
Just one little note, because it took me years to ferret out the proper info concerning the mantua vs. the robe à l’anglaise. It’s possible the mantua is Italian for manteau (French spelling) both of which came to England, but they were not strictly l’anglaises. Manteaus can have the same en fourreau backs – however, not all manteaus had them (some were cut separately from the bodice as well), and almost every manteau was worn over a massive set of paniers, or at least pocket hoops, both of which define the earlier half of the 18th century. The l’anglaise came out in the 1770’s and were worn with bumpads, rolls, etc, but never paniers or pocket hoops. By the way, I’m assuming you used pocket hoops for this gown?
Though a basic bodice with en fourreau for a manteau and l’anglaise look similar, bear in mind there were an endless variety of manteaus, some with elaborate but complicated little “poufs” in back (one of the harder gowns to master correctly).
FYI, the image of the orange-yellow 1770’s open robe from the V&A is really a polonaise. 🙂 L’anglaises weren’t made to be worn hitched up with buttons – polonaises were. And it’s not uncommon for gowns to have two stomachers – ladies constantly matched different gowns with different petticoats, stomachers, etc. Just my two cents’ worth.
brocadegoddess Said:
on September 2, 2009 at 07:38
Cazonetta,
Thanks for your insights. I chose the photo of the 1770s gown because it was the best and clearest image of an en fourreau back I could find, not because it was a mantua.
I would be very interested in knowing the sources where you got your information. Would you be able to tell me? I would then clarify/edit information on here as necessary. I do wish to be as accurate as I’m able.
One of the most important things I’ve learned from doing this project and my thesis research (and which I am stressing throughout my thesis) is the importance of neither making sweeping generalizations, nor pigeon-holing people and clothing from this period. Terminology was just as inconsistent as it is today, and communication (though far superior to 17th century capabilites) could still be sketchy and ‘broken telephone’-ish. In coming down through the centuries a lot of this information has become confused and even contradictory. It’s very difficult to be conclusive about very much.
Thanks so much for reminding me that I ought to keep going through the info I put on here to ensure that it stays up-to-date with my findings and suppositions!
And while it may not have been unusual for a gown to have multiple stomachers made for it, it certainly is rare for them both to have survived to today. Out of approx 75 dresses I examined last summer, and a few more on other occassions, this was the only example that still had both with it. In fact, it was uncommon for the stomacher to remain with the dress at all.
carla phillips Said:
on October 23, 2009 at 10:40
my great grand aunts, ladies born during and just after the civil war, were still using the term “mantua” in the early 1960’s to refer to what we might now call a “duster”…something lightweight with sleeves worn over other clothes. interesting how a term can change meanings slightly through time!
brocadegoddess Said:
on January 7, 2010 at 11:12
Ha! That’s fantastic!
That actually indicates how a term can come full circle. The original ‘mantua’ garment was something like a dressing gown – not so different from the dusters and dressing gowns of the mid-20th century! It evolved to mean actual dresses and gowns throughout the 18th century, and I guess evolved back at some point!
maria Said:
on March 18, 2010 at 13:00
me encanta pero por el idioma me cuesta seguir los pasos pero gracias por las fotos, enhorabuena.
brocadegoddess Said:
on March 23, 2010 at 07:31
can anybody translate this for me? Is it a real comment or spam?
Bess Chilver Said:
on April 9, 2010 at 03:39
This is definitely a genuine comment. I was able to translate a tiny bit – using mostly my knowledge of latin and a bit of Italian and a long buried memory of Spanish.
The gist is:
This is enchanting, but he/she is unable to understand what you’ve written as they do not speak your language, but they do thankyou for the photos.
brocadegoddess Said:
on April 9, 2010 at 07:26
Awww, thanks very much Bess. I wonder if there’s a way to make the blog translatable into other languages. I see that on sites around about. Hmmm….
Abdrew Said:
on April 17, 2010 at 14:50
I can’t tell you how wonderfully helpful these pages are. I’m getting ready to start my own mantua and I’m sure I’ll use your page a lot for reference.
Are you planning on uploading pages for your panniers and chemise? I haven’t made either.
brocadegoddess Said:
on April 18, 2010 at 09:50
I’m very glad you find this useful! I do plan to create pages for the hoop petticoat and the chemise. They are very overdue (like a year overdue) but I’ve been writing my thesis, applying to PhD programs and thus also writing funding applications, and some other stuff. I hope to get back to this within a month, and really get going on getting the last of everything up!
Good luck with your mantua!
Mary Said:
on January 28, 2011 at 10:36
Hats off to a TRUE seamstress and artist. As a long time, and professional reenactor who must rely on others to craft my historical clothing, I know I speak for many other reenactors out there when I say it is most difficult to find mantua makers who do a really good job. I was fortunate to have had a couple gowns made by one in Massachusettes who was wonderful indeed, but has ‘retired’ from the sewing business, alas. I had a very regrettable experience with a ‘hack seamstress’ who has a blog, and fancies herself a professional, but is certainly not, and sadly know many others who have had similar experiences. Recently, (and happily!), I got my first, most lovely and authentic sacque back gown from another rare, TRUE AND EXCELLENT seamstress! Your blog, and the posts chronicling your efforts is inspirational, and make for such a welcome indulgence on a winter afternoon, with a cup of tea…
Mary
http://anhistoricallady.blogspot.com
Elly Said:
on February 5, 2011 at 17:54
Wow, you’re really fast! Just wondering, what undergarments do you put the dress over, because I’m making a dress like that, and it’s hanging horribly.
Thanks 🙂
brocadegoddess Said:
on February 6, 2011 at 11:09
Hi Elly, take a look at the Exhibition page of the blog, it shows the different layers.
Judy Said:
on February 22, 2011 at 04:41
I apologize in advance if this is a silly question, but I thought that the pleats were attached on top of the lower bodice (upper edge of skirt turned under, pleated, then edge of pleats attached to right side of bodice), instead of the pleated skirt attached in a seam with the lower edge of the bodice (sewn right sides together, then both edges of seam finished on inside of garment)? Am I referring to an older, or more recent technique?
Thank you for posting the very detailed photos of your work. I have learned so much from this website!
brocadegoddess Said:
on March 5, 2011 at 10:47
Hi Judy,
If I properly understand the the technique you are describing, I did see examples of it as well. The one I employed was simply that which I encountered most often. I doubt whether one is older than the other, but it’s a very good question that I had not thought to investigate specifically (thank you for the idea!). I saw several variations of technique amongst the garments I examined, leading me to conclude that there was something like a repertoire of techniques upon which period needlewomen drew. There’s always more than one way to skin a cat! However, you have now made me wonder more directly whether there might be a time difference between them, or perhaps even a regional one that I should consider investigating in the future. Thanks so much for your comment!
a traveller in time Said:
on April 9, 2011 at 06:44
You. Are. Truly. Awesome! The photos and your running commentary are truly wonderful. Thankyou so much for posting this.
Louann Said:
on June 23, 2011 at 19:14
What a fabulous dress. You have the patience of a saint, and a very creative eye. Gorgeous.
ama lilith (@rocopia) Said:
on September 16, 2011 at 05:28
Wow, how beautiful this dress is!
I envy you your talent!
Sophie Hood Said:
on August 8, 2012 at 19:53
Hello! What was the yardage for the yellow taffeta? Just to get an idea…
Thanks so much for posting all of this! It’s fantastic! 😀
brocadegoddess Said:
on August 9, 2012 at 13:32
Hi Sophie,
I think I eked the mantua out of approx. 6yds of 54″-60″ wide taffeta. It was very tight, 7-8yds would be a lot more comfortable cutting-wise.
Sophie Hood Said:
on August 9, 2012 at 13:33
Great! Thank you so much!
Eve Said:
on April 11, 2015 at 14:25
Wow, I love what you did! And what an imformation thank you! I was wondering if you know more about colors from this period? And why they used it?
hannah Said:
on March 16, 2016 at 19:39
sad you did not sew it by hand
it is georgeaus but they where originally much more complicated and handsewn with tiny little stitches and more layers of fabric
still you did good job,
hope you find a place and a time to wear it and feel beautiful and happy
but then, you will not be going in a coach with white horses and men to serve you,
you will not be entering halls and endless chambers lighted with candles filled with people dressed as beautiful and complicated as you, having enddles diners, conversations, dances and ofcourse the music..
lucky we are not to be laced in these things from the day we are born. lucky we are not to have to sew these endless seams by hand. lucky we are the beholder, the people back then are the beauty.
excuse my bad english,
please accept my compliment.
brocadegoddess Said:
on March 16, 2016 at 20:11
I don’t really understand your comment. I DID sew it all by hand, and it is a direct copy of an original garment and no less complicated than it. It has all the parts and layers of the original in the Snowshill Collection kept at Berrington Hall in Hereford, England.