Sack Dress
(Ou en francais: Robe a la Francaise)
The sack I am making is a sort of combination reproduction:
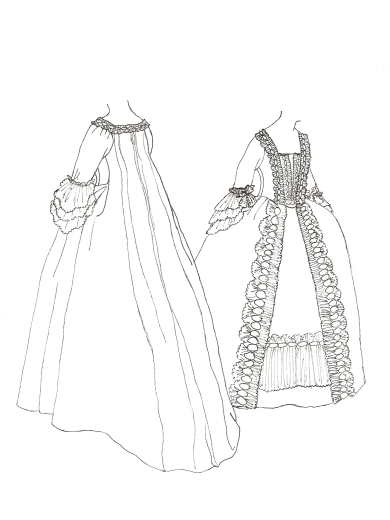
The bulk of the pattern (gown and petticoat) comes from Janet Arnold’s Patterns of Fashion I : a “sack dress with a matching petticoat and a buttoned ‘compere’ or false front; c. 1770-75 Snowshill Manor” (now at Berrington Hall); pg 34. I was very silly and did not think to examine this particular example when I visited Berrington, so am muddling through as best I can with the pattern as laid out by goddess Janet.
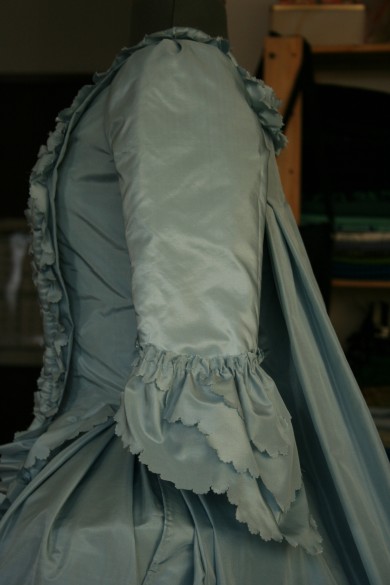
The other influence for this ensemble is a dress in the Museum of London’s collection: accession #53.101/14; a pale blue sack dress c. 1760-70. I will be trimming the reproduction in the same manner as this dress with ruched, padded, and pinked strips of self fabric. Other elements from this dress that I’m replicating are: the lacing in the bodice centre back seam to allow fitting adjustments; double as opposed to treble flounced falling cuffs; making a separate stomacher (now missing from the original garment) instead of a compere front.
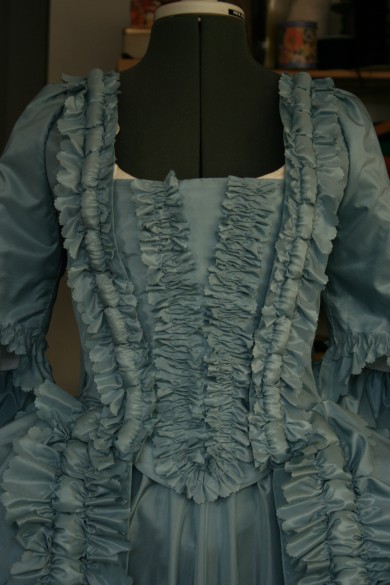
The sketch below illustrates this amalgamation. It is a copy of the sketch in Patterns of Fashion for the pattern I used, with the addition of trimmings and stomacher (as opposed to compere). The trimmings around the neckline, down the robings, and down the skirt front edges are taken directly from the gown at the Museum of London.
The stomacher and petticoat trimming are projections of my own based on other artifacts I observed during my two months in England. If you think this is a sketchy form of practice and too close to “made up”, let me know – especially if you have any alternative suggestions for me. The reason I have chosen not to leave these plain is that, from what I have seen and read so far, these components of a 1760s ensemble would have been made and trimmed to match the gown. But do give me your two cents!! I will not be trimming for a while yet as I am waiting on a scalloped pinker for finishing the edges of the self fabric strips that make up the trimmings.
Materials:
– pale blue tabby (plain) weave 100% silk taffeta
– bleached plain weave 100% linen
– Gutermann 100% silk threads in white (col. no. 800) and pale blue (col. no. 143)
Day 1
I cut out the gown pieces (back, bodice fronts, and skirt fronts), sleeves, bodice lining pieces (fronts and backs), and sleeve lining. I started with 8 1/3 yards of 60″ wide silk taffeta – we’ll see how much (if any) is left after I’ve finished all the cutting.
I sewed the long seams of the gown (centre back and skirt seams) including adding what would have been fabric joining seams. Silk fabrics of the 18th century were typically 18″-20″ wide, and panels were sewn selvedge to selvedge. In order to make the dress fit neatly into my fabric’s width, I added seams for a fabric of approx 19″ width.
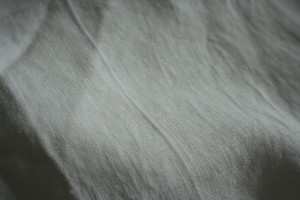
The centre back fabric joining seams were sewn with small running stitches
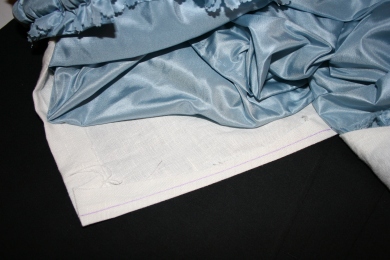
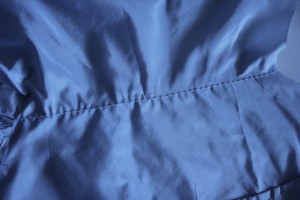
As you can see here, I created the fabric joining seams by simply folding the material into a 1/4″ tuck. The reason I did not actually cut the fabric is because in original garments these would be selvedge edges, not raw and requiring overcasting to keep them from fraying. If I had cut the fabric extra time that would not have gone into original production processes would have been taken up in finishing the raw edges, or an inaccurate type of seaming would have been required.
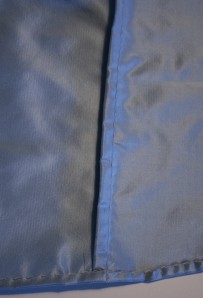
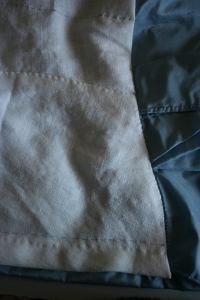
The edges where the gown back and skirt front join are cut at angles, and thus have raw edges; this was a common feature among dresses I examined at the Museum of London. For these seams I turned under the seam allowances twice, tucking the raw edges in, then sewed with small running stitches again.
As you can see, I hemmed the dress as well, by folding the raw edge over twice into a narrow hem and slipstiching it. I also finished the front edges of the skirt in the same manner.
My lesson from Day 1: small running stitches take longer than you think – especially when you’re doing long seams of them!
Day 2
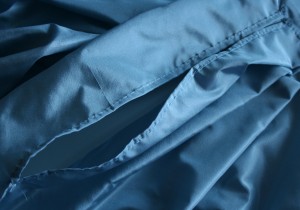
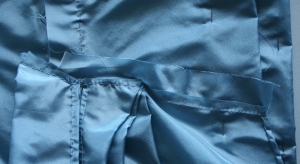
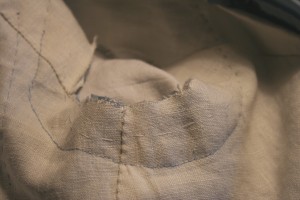
In between Day 1 and Day 2 I realized that I had been a goof and forgot to leave the skirt side seam in the dress (where the dress back and skirt front are joined) open for pocket slits – D’oh! I therefore unpicked said seam to the length of slit given on Janet Arnold’s pattern, and finished the edges of the slits thusly:
Once the pocket slits were out of the way, I sewed the ‘fabric join’ seams in the petticoat front and back in the same manner as for the gown (refer to the first photograph).
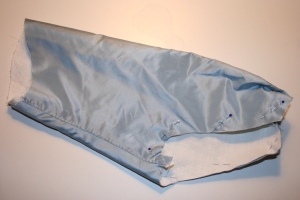
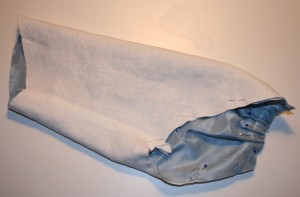
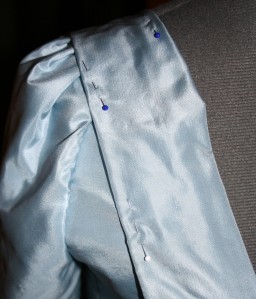
Next I sewed the seams in both the silk and linen lining layers (say that 10x fast) of the sleeves. I have already pinned the two layers together along with the shoulders pleats, and don’t want to undo them. Therefore the photos show the sleeves roughly put together. The seams in the silk are lapped and sewn with what a running stitch that is long at the back and very small, almost like a ‘stab’ stitch on the right side. The seams in the linen are also lapped, but sewn with small slip stitches.
I then sewed the side, back shoulder, and centre back seams of the bodice lining. The first two of these seams are lapped and sewn with small slip stitches in the same manner as the sleeve lining seams. The centre back seam is sewn with backstitch, and only for 4 1/2″ from the top edge. Below this is left open; eyelets will be sewn to the edges for lacing.
Finally I pleated and pinned the back of the gown to create the sack-back for which this style is named, and the sides of the gown skirt. The former was done mostly because I wanted to see how it would look, the latter in preparation of sewing on the bodice fronts.
Day 3
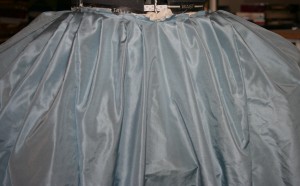
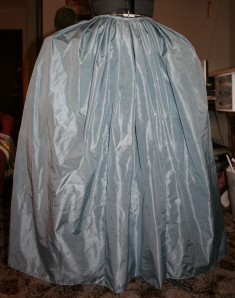
Because I was tired at the beginning of the day, I felt it was safer to start with simple sewing; so I sewed the side seams of the petticoat – remembering to make the pocket slits this time! These look very similar to those in the gown photographed above. Because I just couldn’t wait, and wanted a feeling of achievement, I then pleated up and basted the waistline. Here is what the petticoat looks like so far:
The next major achievement of the day was to sew the bodice fronts to the gown back. This meant sewning both a side and waist seam around a corner on the same piece. The side seams were lapped with the seam allowances facing towards the back of the gown and sewn with the same type of running stitch used on the sleeves.
The side seam was pretty straighforward. The waistline seam was a little trickier, but not as fiddly as I was expecting. I essentially mounted the bodice onto the skirt with the seam allowances facing upwards and sewed the seam with quite small slip stitches. Because the slip stitches are too small to go through all layers, I also basted the pleats together and down to the waist seam allowances with back stitches. The raw edges of all of this will be covered up by the bodice lining.
After this I began mounting the gown onto the bodice lining. I started by draping the bodice lining on my Judy, then I pinned the gown to it at the back neck along the sack-back pleats. I took this as my point of reference for the rest of the bodice. I smoothed the gown over the bodice lining, pinning it down as I went. Once this was done I took the whole thing off of Judy, basted the back pleats to the lining along the top edge where the stitching will eventually be concealed by the back neck yoke, and stitched down the pleats to the bodice for 4 1/2″.
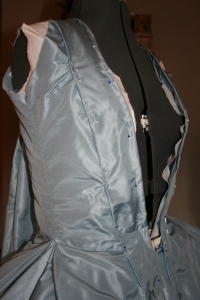
Finally I stitched a line marked on the pattern that creates the fitted appearance of the gown despite the free flowing back pleats. Here is what I mean:
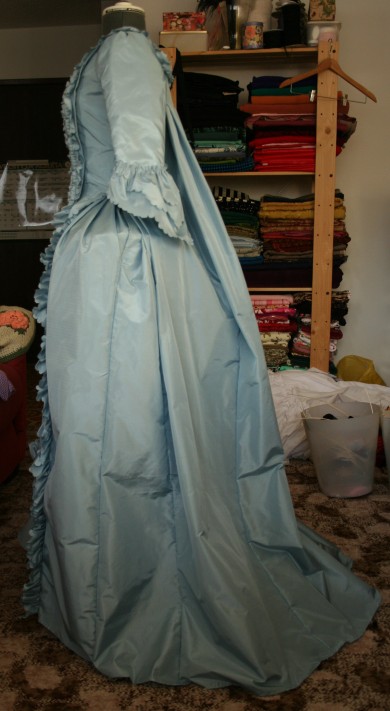
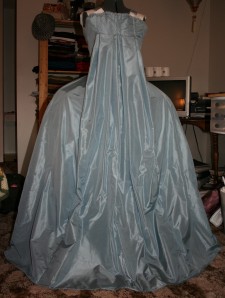
At the end of the day I just couldn’t resist putting the whole shebang together to see how it looks so far. I have to say it’s encouraging and I’m pretty excited about seeing it all done! Have a look-see yourself, and (as always) feel free to give feedback. There are likely some adjustments to make, I will fit the whole thing on a body in stays before continuing with the sewing that attaches the gown to the lining and sewing on the sleeves.
Day 4
Well, I thought I didn’t have a set of 18th century stays in my size. Evidently it pays to keep track of what it in one’s “tickle trunk” (aka big corrugated carboard appliance box), because I was rummaging around in there the other day and found a pair I had completely forgotten about! So now Judy is sporting a set of stays, albeit of a slightly later period than the dress (c. late 1770s-80s). I think these suffice (despite not fitting Judy properly in the bust since her’s isn’t malleable) for now. Before I finish the ensemble up completely, I ought to have a proper set of stays, and will find a real body to put the whole thing onto; my own if need be.
I started with the sleeves today, but got myself a little mixed up. I misread a notation on Janet Arnold’s pattern and ended up trying to set one of the sleeves in backwards. Oops! After resolving that little issue, it still took a couple tries of pinning and placing to get them in properly.
Eighteenth century seamstresses used a particular procedure to set in sleeves. First they would sew the underarm portion of the armhole seam using backstitch. (I am going to go back through my artifact photos to double check just how much of a seam allowance should be left. At present it is 1″ but that is too much, at least for all the way round the armhole)
Then they would fit and pleat the sleeve head as necessary on the actual client (who would be wearing her set of stays) and tack them down to the linen lining shoulder piece with running stitches.
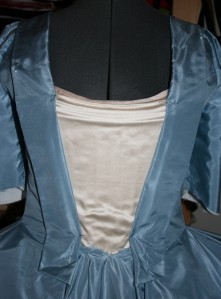
Finally, the robing would be laid over the shoulder to hide all the stitching, and was sewn to the back of the dress bodice, I used slip stitch for this.
Before I sewed down the ends of the robings to the dress, I lengthened them by piecing small scraps of fabric to the ends with backstitch, as I had found them a little bit short.
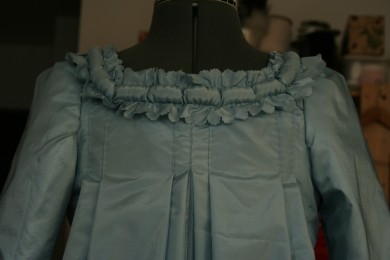
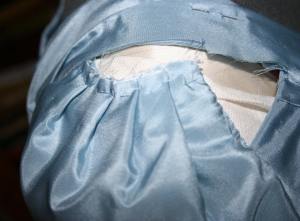
Once the sleeves were in and the robings stitched down I realized I had entered the finishing stage! The next step I took was finishing the back neck with a small triangular yoke, as is common on these garments. I folded under the edges 1/4″ and appliqued the yoke directly over the back neck edge with slip stitches.
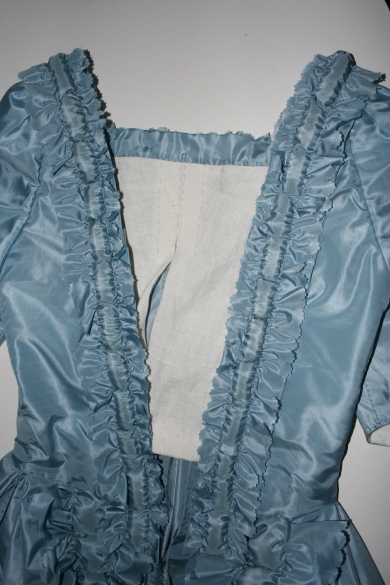
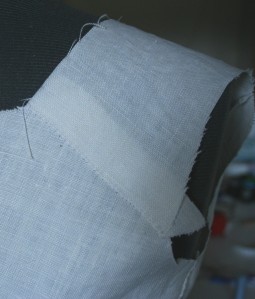
My final task for the day was finishing inside the front edges of the bodice. I observed at the Museum of London and elsewhere that the linen lining was often folded under in such a way as to create a narrow sort of flap. I also noticed that this was frequently dotted with pin marks (as opposed to stitch marks, which look different), which strongly suggest these were used to pin stomachers to the bodice so that the silk itself would not get damaged.
I therefore replicated this in the linen lining of my dress, as well as tacking the underside of the robing to one of its own folds to help cleanly finish it (another practice I observed in artifact garments). All of this sewing was done using small running stitches.
This is how the bodice front is looking now.
Day 5
I realized that there was in fact a number of things I could still do towards finishing this dress before my pinking tool arrives (hopefully soon, I’m getting antsy).
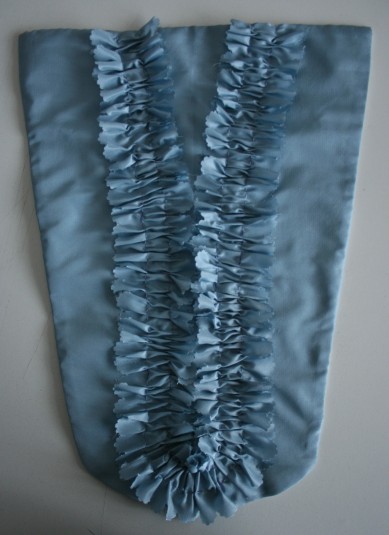
I started off by doing some cutting – of the top sleeve flounces and the stomacher pieces (silk and linen lining).
Then I got to some sewing. I finished the inside front edges of the bodice, sewing the lining to the insides of the robings and over the shoulders. This consisted primarily of turning under the raw edges of the linen lining and slip stitching them to the undersides of the silk. Some of this stitching shows on the right side of the garment, but only on the robings where it will be covered with trimming (if my pinking tool ever arrives).
Next I finished up the waistline seam of the bodice lining using small slip stitches to sew it to the seam allowance in the silk.
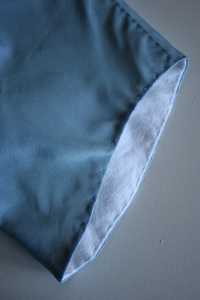
Next came the sleeve hems. These were finished by turning under the raw edges of both the silk and the linen towards each other, and sewing the bottom edge shut with small-ish running stitches in the blue thread. This ( and the finishing of the bodice inside front edges) was done in accordance with many (if not all) of the artifacts I examined. White thread was used for seaming the lining pieces together, but wherever the lining was sewn to the outer fabric of the garment coloured thread matching it was used even if it showed on the lining fabric.
That was most of the sewing for the day. I spent the rest of it cutting out strips for the bodice and skirt trimmings along with a piece that will be used to create the decorative flounce on the petticoat. The only other sewing I did today was piecing the trimming strips.
Oh wait, I almost forgot about the stomacher! (I literally did, thought I was done for the day and then remembered it *palm-to-forehead slap*)
I also apparently forgot to take a picture of it (*’nother smack*). I’ll try to get that done asap.
Day 6
Although this says ‘Day 6’, it’s actually over 2 months later. Hence, my pinker has long since arrived and I’ve been working on pinking the decorative strips and flounces 1/2 hour per day for the last couple weeks.
Thus, today was the day to start trimming the sack – finally the really fun stuff!
I started with the trimming that runs down the front edges of the dress skirt. I began by gathering up the strips like so:
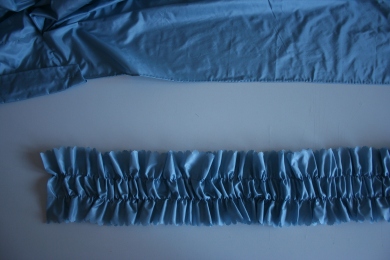
I then running stitched the trim to the skirt edge along the gathering line closest to the edge


I next pinned out the spacing of the ‘pouffes” that characterize the trimming of this ensemble. I had a feeling this wasn’t quite a period technique, but it’s what I could think of at the moment.

I then took small hunks of wool batting left over from the quilted petticoat (this is why you get extra of stuff) and stuffed them into the 1 1/2″ long spaces under the side of trim not yet stitched to fill out the central channel.

I finished it off by running stitching along the other gathering line to the skirt.
Now, I had started by sewing down each ‘pouf’ individually – stitching the fabric down between each ‘pouf’ – but soon found out this wasn’t necessary (thank goodness, because it was horribly tedious!). I discovered that I only needed to pin between each ‘pouf’ then stitch along the gathering line – the poufs hold themselves in place and separate – whew!

finally I scalloped the outer edge of the trimming every 3 pouffes.

With all the figuring and playing around with it the first side took 4 hours to do. Luckily, the other side took only 2 1/4.
Once the skirt front edges were done and trimmed, I moved onto the petticoat flounce. I was dork and forgot to take pictures of the process, but it’s really just the same thing as the front skirt edges.
Here’s how they both look all trimmed up and pretty!

As my last task of the day I sewed on the front waistband of the petticoat – however it appears I was a dork again and didn’t take pictures of this. I did take pictures for the back however, so the process can be seen on the next day.
Day 7
As you may surmise, the first thing I did today was finish the petticoat waistband.

step 1: sew waistband to right side of skirt

The underside of step 1 step 2: press the waistband away from the skirt (I didn't get a picture of this, but I think you can get the idea)step 3: fold the waistband tightly to the backstep 4: stitch the waistband down at the back























Julia Said:
on September 16, 2008 at 09:50
OK, questions for consideration:
-Why did you choose Arnold’s pattern? (What made her think it was representative?)
-Why is the gown blue? (Not a facetious question, it could have been Barbie pink.)
-Are you learning anything as you sew about the particular stitches and techniques that you have seen in original garments, and why they were specifically chosen? (Ie: why do they work so well?)
-You mention draping as a technique; in your reading, is this something that would have been done? Or would women have already had individually-fitted patterns from which they worked, thereby eliminating the need for a dress form?
LiveGown Said:
on May 10, 2014 at 00:11
good-looking
brocadegoddess Said:
on September 16, 2008 at 10:56
Thanks for the questions Julia, I will answer as best I can:
1. I chose this pattern of Janet Arnold’s not based on whether she thought it was representative, but because I did, based on a combination of observation of actual garments, and readings. Although as we both know, what is and is not representative is a problematic issue. What survives with regards to real garments was by selective choice – as you know even better than I. However, nearly all literature on 18th century fashionability refers to the sack as ubiquitous. This was recently further supported by Barabara Johnson’s Album in which she documents having had a number of sack made for her. Although I have also read that the English generally preferred more fitted styles, it seemed appropriate to include one sack gown amongst the whole of project.
2. I “chose” this particular fabric and colour originally because it was something I already had in my stash and would not have to shell out money for. However, the particular dress from the Museum of London I am also basing this ensemble on is a similarly coloured blue (though more robins-eggy) and the same weave.
3. Two things I am picking up so far regarding stitches is that they are relatively quick (I am slow-ish now, but getting gradually faster, I imagine someone who did this as a living could whip these running and slip stitched seams off in a trice!) and also quick and easy to take out if necessary. Thus far, my experience is suggesting a feeling of overall flexibility.
4. From what I have read (mostly in Clare Haru Crowston’s book “Fabricating Women: the seamstresses of Old Regime France; and who believed process of production was similar between France and England) the construction of women’s dresses was a combination of pattern cutting and draping. The process was essentially the same as that which I have used (that’s why I’m using it). Pretend my Judy is a real person – when I drape and fit elements of the garments on her, it is during parts of the process that it would be done on a client. Clients would come in for at least one fitting during the process, have the gown draped and fitted onto them over their own stays, the sleeves would also be fitted at this time.
How’s that? Thanks very much for the questions and reminding me of the kind of information I should be including in my pages.
michelle Said:
on November 22, 2013 at 15:09
may i ask where you got the fabric? i costume antique dolls and have been looking for taffeta of this quatlity thank you!
brocadegoddess Said:
on November 28, 2013 at 21:18
I got it from a discount bin at a store in Toronto almost 10yrs ago now.
Melissa Said:
on September 16, 2008 at 14:42
Gorgeous! I adore the blue color. I’ve been wanting to make a Robe Anglaise out of that color, but have not yet found the right color/price. Kudos for hand stitching! How long have you been working on this so far? It seems to be going together incredibly quickly.
I was encouraged to finish my 18th century stays by hand (I will be assembling it and finishing the eyelets by hand), but all those boning channels would just take forever! My instructor told us we should have about 14 stitches per inch on the boning channels, and I need the stays finished a bit sooner than I can hand stitch them.
Julia Said:
on September 16, 2008 at 20:31
Great stuff, Carolyn! I loved reading your answers even more than seeing the pretty pictures: guess I really am a historian, eh? I have to admit most of these questions were sort of trick questions – I know you know the answers, but I just wanted to make sure you’re thinking deeply about the project. Blue, from my knowledge of painting in this period, is a hugely popular colour: Singleton Copley and Gainsborough, as well as others, paint women in blue sack gowns with lace engageantes and shawls or collars over and over again in the 1760s. I can find you some examples, if you like?
brocadegoddess Said:
on September 16, 2008 at 20:50
Oooh, Julia that would be great! I know what you mean about the paintings of women in blue (I visited the National Gallery several times over July and Aug…mmmmmm…). But I think posting images on here might really help evoke mood and provide a certain type of context.
brocadegoddess Said:
on September 16, 2008 at 22:48
Thanks Melissa, that fabric has been quietly biding its time in my stash for several years now until the perfect opportunity presented itself. Voila!
Each “Day” of the journal is twelve hours of work – basically sun-up to sun-down. So 3 days = approx 36 hours (give or take a bit). It’s all part of the project, which includes replicating certain elements of an 18th century seamtstresses working life. I will soon be adding another section on here dealing specifically with that aspect and the other peramaters I have set myself. I also hope to get faster at handsewing as I go along – there are a lot more garments to make – including a set of fully boned stays!!
Alicia Said:
on September 21, 2008 at 16:14
Hey i noticed you were draping without having the corset under…. I have been replicating 18th century historical fashion for over 12 years. I hand sew and use all the techniques used in the 18th century to construct my garments… But one importaint thing that I am so sure of… is that they need to be draped over the corset worn or the correct body shape for the time peroid. Also have you thought about a quilted petticoat?…. The URL that i attached has a mantua gown in red that I also put a false button up front in. Also… have you thought about avaiable dyes.. where they would have come from and how expensive that would have been? just a thought
brocadegoddess Said:
on September 21, 2008 at 16:56
Ah, I should have clarified this more. I have also been doing historical/costume sewing (in a less scholarly sense) for a number of years prior to now. There is a (sort of a) method to the madness!
There are 2 reasons why you do not see a set of stays in the photos:
1. I didn’t think I had a set of 18th century stays. Lo and behold a couple days ago whilst rooting through the costume box I found I did have a pair that were nearly done that I had made for myself a few years ago. They turned out to be a little too big for me though, so now they are gracing Judy, and can be seen in photos as of…later today I hope! They are more 1770s-80s in style, but the pair I make will be more 3rd quarter.
2. Pattern-wise this ensemble is pretty much a direct copy of the example in Patterns of Fashion (pp 34-35), I’m not even changing the size. The original was made to fit over stays (and likely partially made directly over them on the original client) already. I therefore did not think it absolutely necessary to have them, especially considering my supposed lack, and that Judy doesn’t really fit into them very well anyway.
Final fittings will be done over the stays I make. The reason I didn’t make the stays first is simply because I do not yet have all the materials I need for them. I had all of the materials, if not all the tools (pinker), for the sack ready to hand, and I needed to start ASAP to have any hope whatsoever of accomplishing as much as I hope to.
Perhaps I was taking a bit of a risk in proceeding this way, but I figured it was a pretty calculated one. And if I have to make some sort of alteration/adjustment, that could just add to the authenticity of it! lol
Alicia Said:
on September 21, 2008 at 17:47
do you have the pinkers…. they can be purchaced at william booth drapers web site. i am having them make me a different size…. a freind of my got hers recently which was also made a different size and scale to her preference and we are waiting to have time to test them out first… but i think they are great
brocadegoddess Said:
on September 21, 2008 at 18:33
Lol, I just ordered a 1″ pinker from them last week. Hopefully it won’t take forever to get here, since it’s going to take forever to pink all the trimming I’m planning to put on things!
Mark of Past Pleasures Said:
on September 22, 2008 at 08:28
My dear Seamstress
Interesting to read of your progress – the blue sack looks lovely! I saw ‘The Duchess’ the other night; costumes not too bad, but the etiquette is all over the place…have you seen it? Next weekend I’m attending the Jane Austen Ball in the Assembly Rooms, Bath! Doubtless there’ll be a few in the company who think they look like Darcy and Miss Bennet, but in reality look like hippos in tutus! Should be a laugh – and certainly a lovely location. Wish you could be my dancing partner!
PS: Did I tell you that I bought at auction THE most stunning and rare printed cotton shirt, named and dated (in ink: May 1863) The fools selling it thought it a night shirt – but it has holes for ‘shirt buttons’ (cufflinks) and for ‘shirt buttons’ (studs) which no-one wears to bed! Plus it is too short for a night shirt…It’s white cotton with a repeat pattern of mauve flowers, in two shades. A real bargain and a great addition to my collection. My ex-wife/current business partner Steph bought several v rare late 19thc corsets at the same auction – one French c1880 made of horsehair. What larks! x
Mark x
Zip Zip Said:
on March 16, 2009 at 18:22
My goodness, what a lovely result! The detailed pictures really accurately display how the garment was constructed.
My only wishes: images, if you have them, of how physically the seamstress holds her hands when she sews the sleeves to the lining, and images and a description of what it is like to work with an antique-style pinker. If you ever get a chance :} After all the hours you’ve spent — what was it, over 100,000 stitches total for all the ensembles? — and all the calluses and needlepricks, perhaps you’re not up for more detail. No matter. What’s here is a costumer’s and historian’s dream.
Thanks again,
Natalie in Kentucky
brocadegoddess Said:
on March 16, 2009 at 20:06
Natalie: I will try and get some of that info on here for you. Just please be patient with me. Although my schedule is not quite so…….intense now I do have to start writing me thesis now that the sewing project is done, so updates (while hopefully much more regular) may still be a little on the slow side. Thanks for all your great comments btw and that lovely lovely post about my project on your blog, it was fantastic and you got the nature/purpose of it just right!
erin Said:
on December 30, 2009 at 00:57
i am in the midst of making a francaise sack myself. i am using a simplicity pattern, but altering it quite a bit to make it more “screen accurate” for reinette from doctor who, and also because some elements of the gown are awful as far as accuracy goes, particularly the stomacher. how does yours attach?
brocadegoddess Said:
on January 1, 2010 at 21:57
The stomachers on these dresses attach with pins. This is how it was done in the 18th century. I have also heard that another option was to be sewn into your dress. On ‘for-fun’ costumes I have made in the past I used hooks and eyes.
Steph Said:
on June 15, 2011 at 10:03
Beautiful! Thank you for the details. Where did you get the scalloped pinker please?
Sierra Said:
on March 14, 2012 at 18:27
It’s absolutely lovely. I play piano and several months ago began playing period music in period costume. I don’t sew but I have access to a wonderful dressmaker who has made me several similar rococo dresses. I love wearing them!
Iris Said:
on April 11, 2012 at 08:52
The ‘pouffes’ are really well made and it looks beautiful! I wonder whether the fabric had to be sort of shiny or not, ’cause I think I prefer prints better. But anyway, the dress is fabulous!
Deb Said:
on April 12, 2012 at 11:18
Beautiful!!! Love the color of the silk. Please tell me the name of the pinking tool—-I want one!!! Magnificent sewing 🙂
brocadegoddess Said:
on April 18, 2012 at 15:03
Hi Deb,
Thanks for your comment. The tool is simply called a scalloped pinker or pinking tool. I got it from Green Man Forge, which seems to have shut down their website. However, after a little digging I discovered they may not be entirely out of business. Here is the contact info I found,up to date as of Jan 2011:
Green Man Forge
1143 Bleistein Street
Cody, WY 82414 USA
Phone: 307.272.9368
The tools came in different sizes when I got mine. I think mine is something like 3/4″ but I’m not 100% sure off the top of my head.
Good luck!
hannahsuthers Said:
on March 24, 2013 at 20:32
hello 🙂
I was wondering if you would remember how much fabric you had left over? i see you mentioned you started with 8 1/3 yards, but couldn’t see if that all you needed in the end.
thank you
Hannah
ps. I’m making a copy of LACMA’s printed cotton sackback, so feel free to have a nosy. I’m only on the printing fabric stage at the moment, but hopefully i’ll get going in a few weeks.
brocadegoddess Said:
on March 25, 2013 at 10:28
Hi Hannah,
Thanks for the question, I hadn’t realized I missed following through with that bit of info. I had about 1/2 yd of the fabric left over, with some additional small scraps pieces. I’m actually planning to use it sometime this year for a set of 1780s stays. Good luck with your LACMA copy, I’m really going to have to visit their collection one of these days!
hannahsuthers Said:
on March 25, 2013 at 13:38
brill! thanks! ooh yes that’ll be beautiful 🙂
Celine Said:
on March 29, 2013 at 23:06
Wow! It looks so beautiful!
I’m planning to make one for myself, and here are some questions. I’m considering if I should buy a book like Patterns of Fashion, is it Patterns of Fashion 1? Are there detailed instructions in the book? (I’m quite wondering, as I’m Chinese and need clear instructions of making this.) Will the dress work with cotton? Thank you!
Celine
brocadegoddess Said:
on April 16, 2013 at 11:03
Hi Celine,
I do believe it is Patterns of Fashion I, and it’s fabulous for the type of documentation made, these books are bibles amongst anyone interested in historical dress. However, there are only some notes of observations goddess Janet made, no actual instructions on how to construct the garments. The intent of these books was not really to be a how-to instruction manual, the intent was more about historical research and to provide historians greater understanding of historical dress construction. You probably want to be quite comfortable with garment construction before using these patterns. Try a google image search for Patterns of Fashion – some of the patterns and illustrations have been posted online and can give you an idea of the amount of information provided. Good luck! Oh-and yes, this style of dress would also have been made in cotton: fashionable and formal in the earlier part of the century, a little more casual later in the century.
Stacie Said:
on June 25, 2013 at 21:14
I suggest you buy a pattern from JP Ryan, they have a Rococo/18th century sack gown/
Robe à la Française pattern, also a Robe à l’Anglaise pattern, and jacket/bodice/top half of the dress pattern set. Its one of the most historically accurate patterns for sale and if you are a beginner at sewing I recommend either the Robe à l’Anglaise pattern or the jacket/bodice pattern before you try the sack gown/Robe à la Française as that is much more difficult. There is even a video on the Robe à l’Anglaise pattern from JP Ryan, some girl posted the tutorial step by step video on making that dress from that exact pattern: http://www.youtube.com/watch?v=fR13H0Kp8VI
and here is the website the patterns are available on: http://www.jpryan.com/ladiespatterns.html
Jennipher McCabe Said:
on February 21, 2017 at 23:16
Wow! Your pictures were so clear and I love how well you explained all of the steps! Thank you a million times for such a fantastic blog!
wanzleben Said:
on August 11, 2017 at 17:46
💗💗💗
pamela JONAS Said:
on October 11, 2017 at 15:08
Stunning!!!